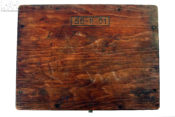
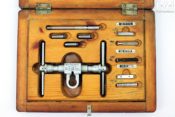
The 56-И-01 Soviet 7.62×39 gauges set

A few years ago, one of my usual suppliers had the chance to get his hands on one of the holy grails of the Soviet equipment-loving technician that I am: a 56-И-01 control case for the three weapons in 7.62×39 put into service quite at the same time at the end of the 40s, RPD-44, SKS-45 and AK-47. It is without any hesitation that I acquired this set of tools… as well as a control box for Mosin-Nagant rifles, which I will talk about another time…
A pragmatic set
During the career of a small arms technician, the use of control tools is a recurring point of the “armament inspection” carried out in each French institution… and probably in all countries of the world. The control cases may, depending on the weapons and manufacturers, be more or less provisioned… with more or less crazy tools, even disturbing!
There are usually a few must-sees:
- Headspaces gauges.
- Firing-pin protrusion gauges.
- Extractor spacing gauges.
- Barrel bore gauges.
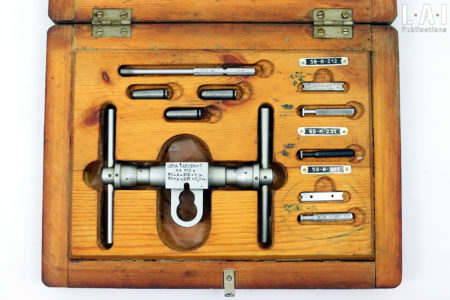
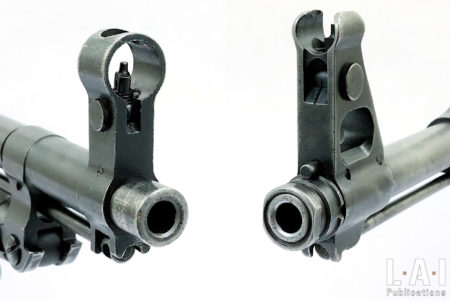
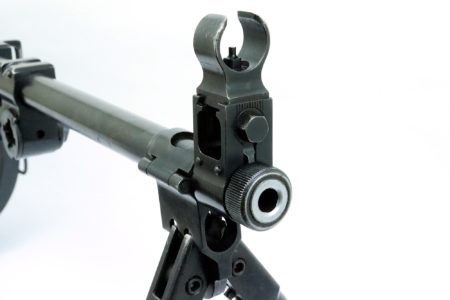
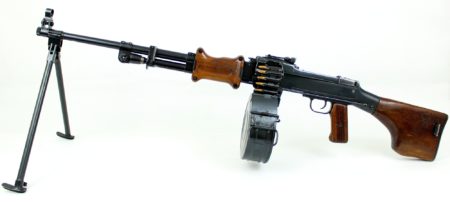
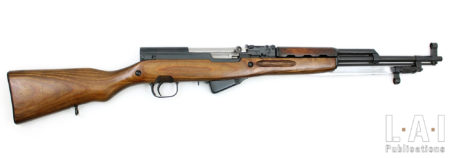
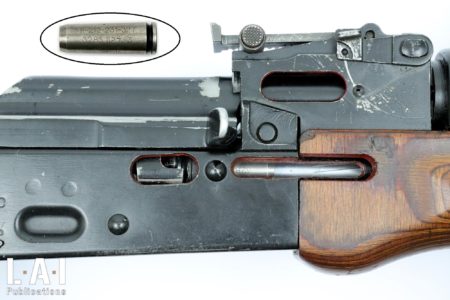
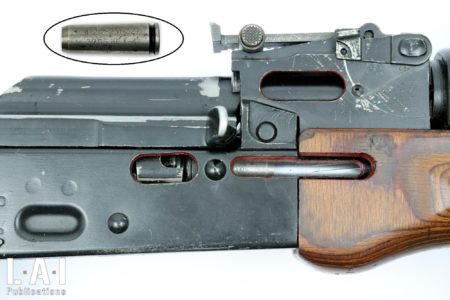
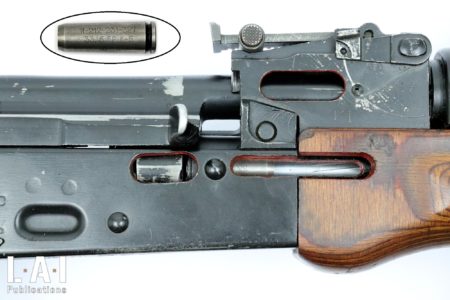
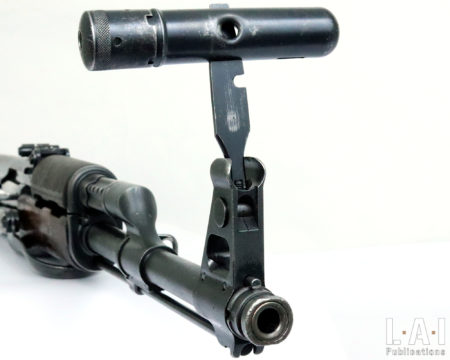
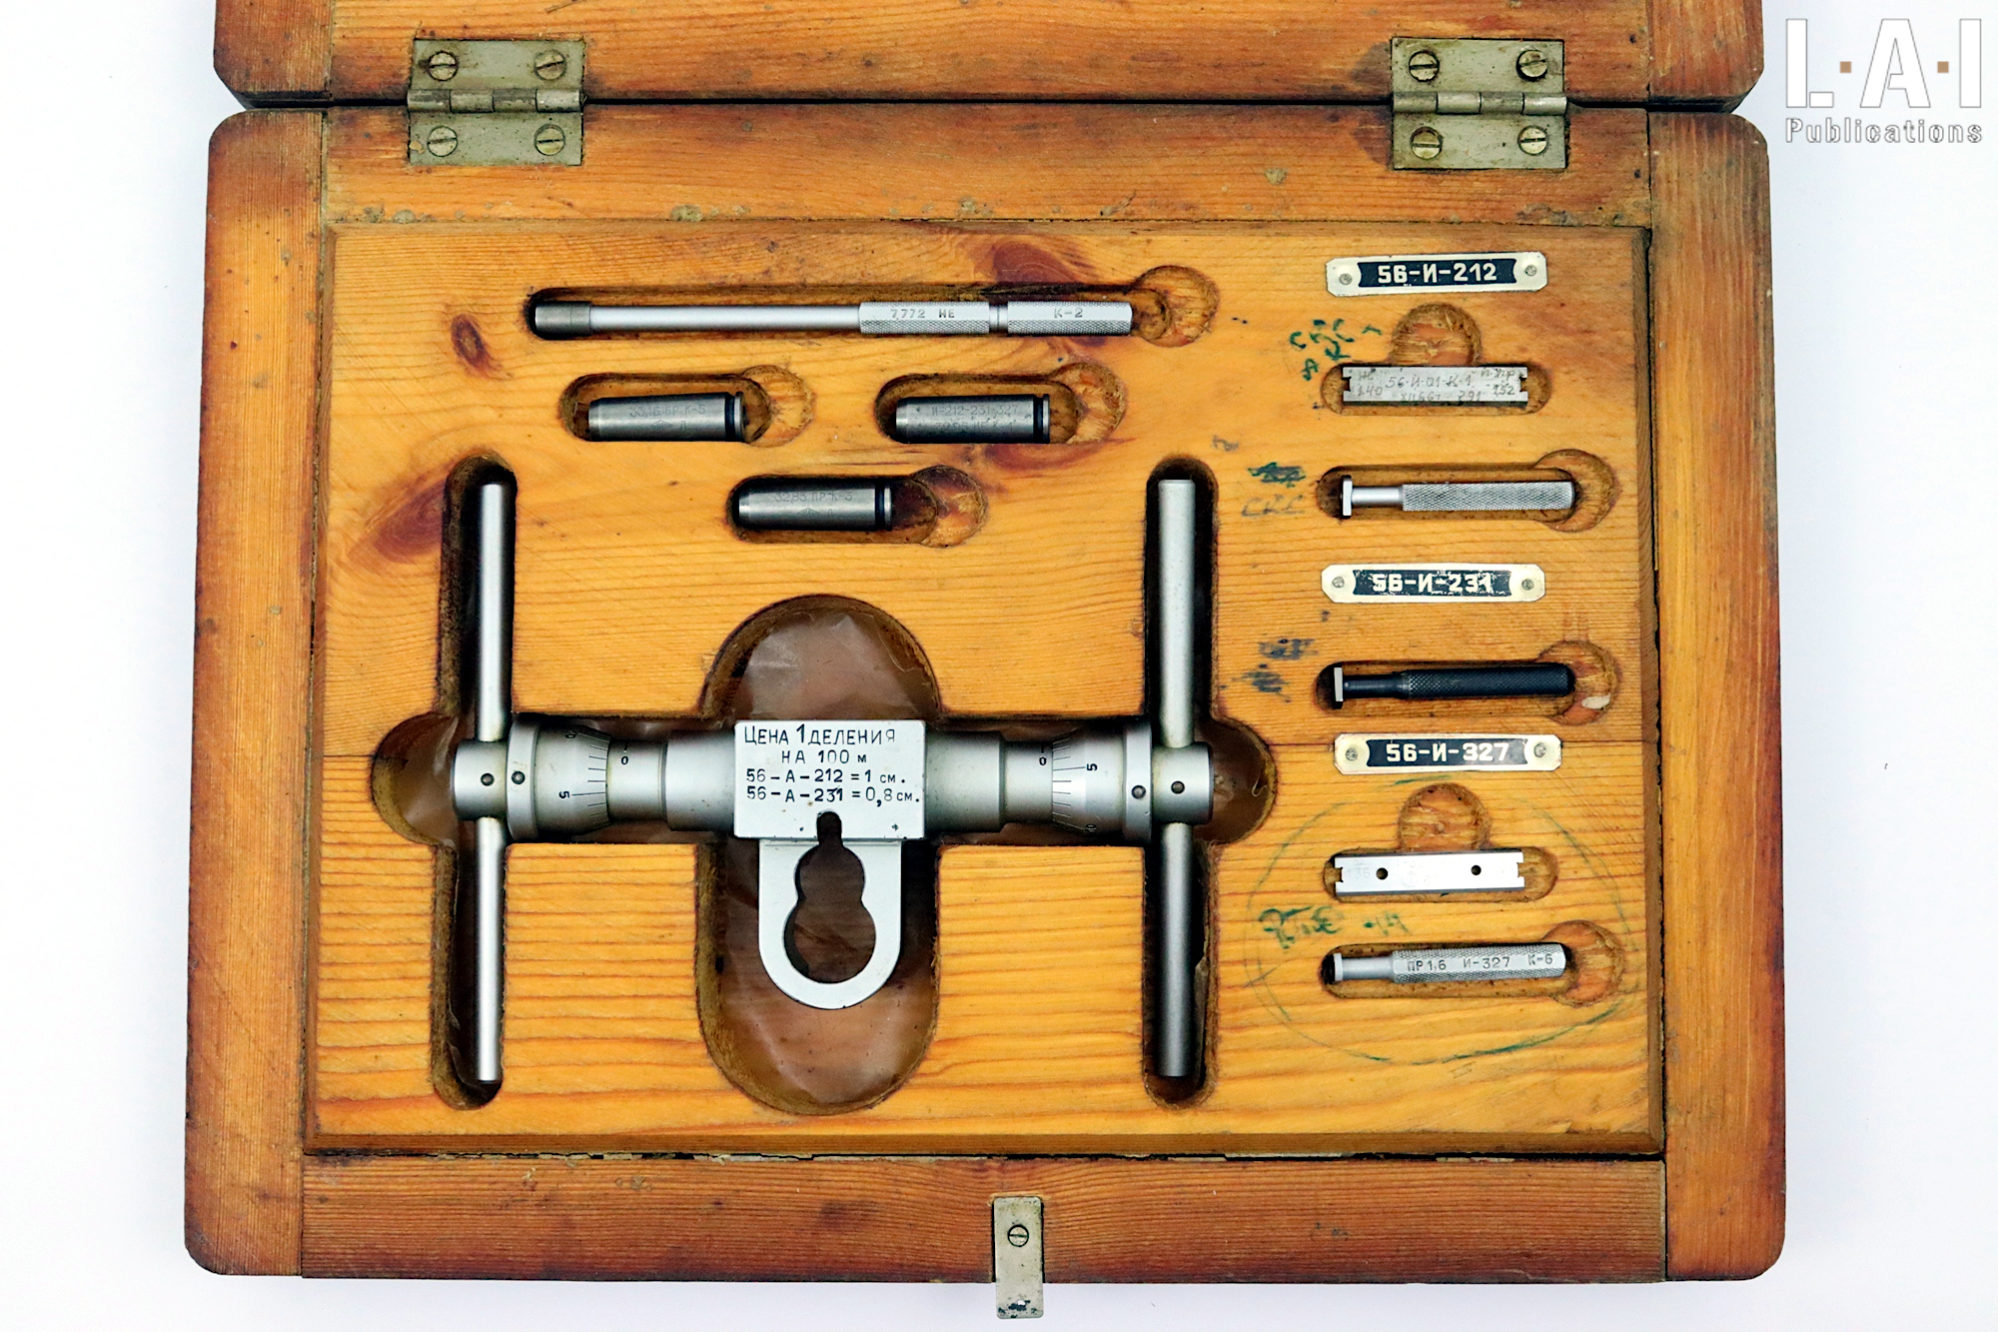
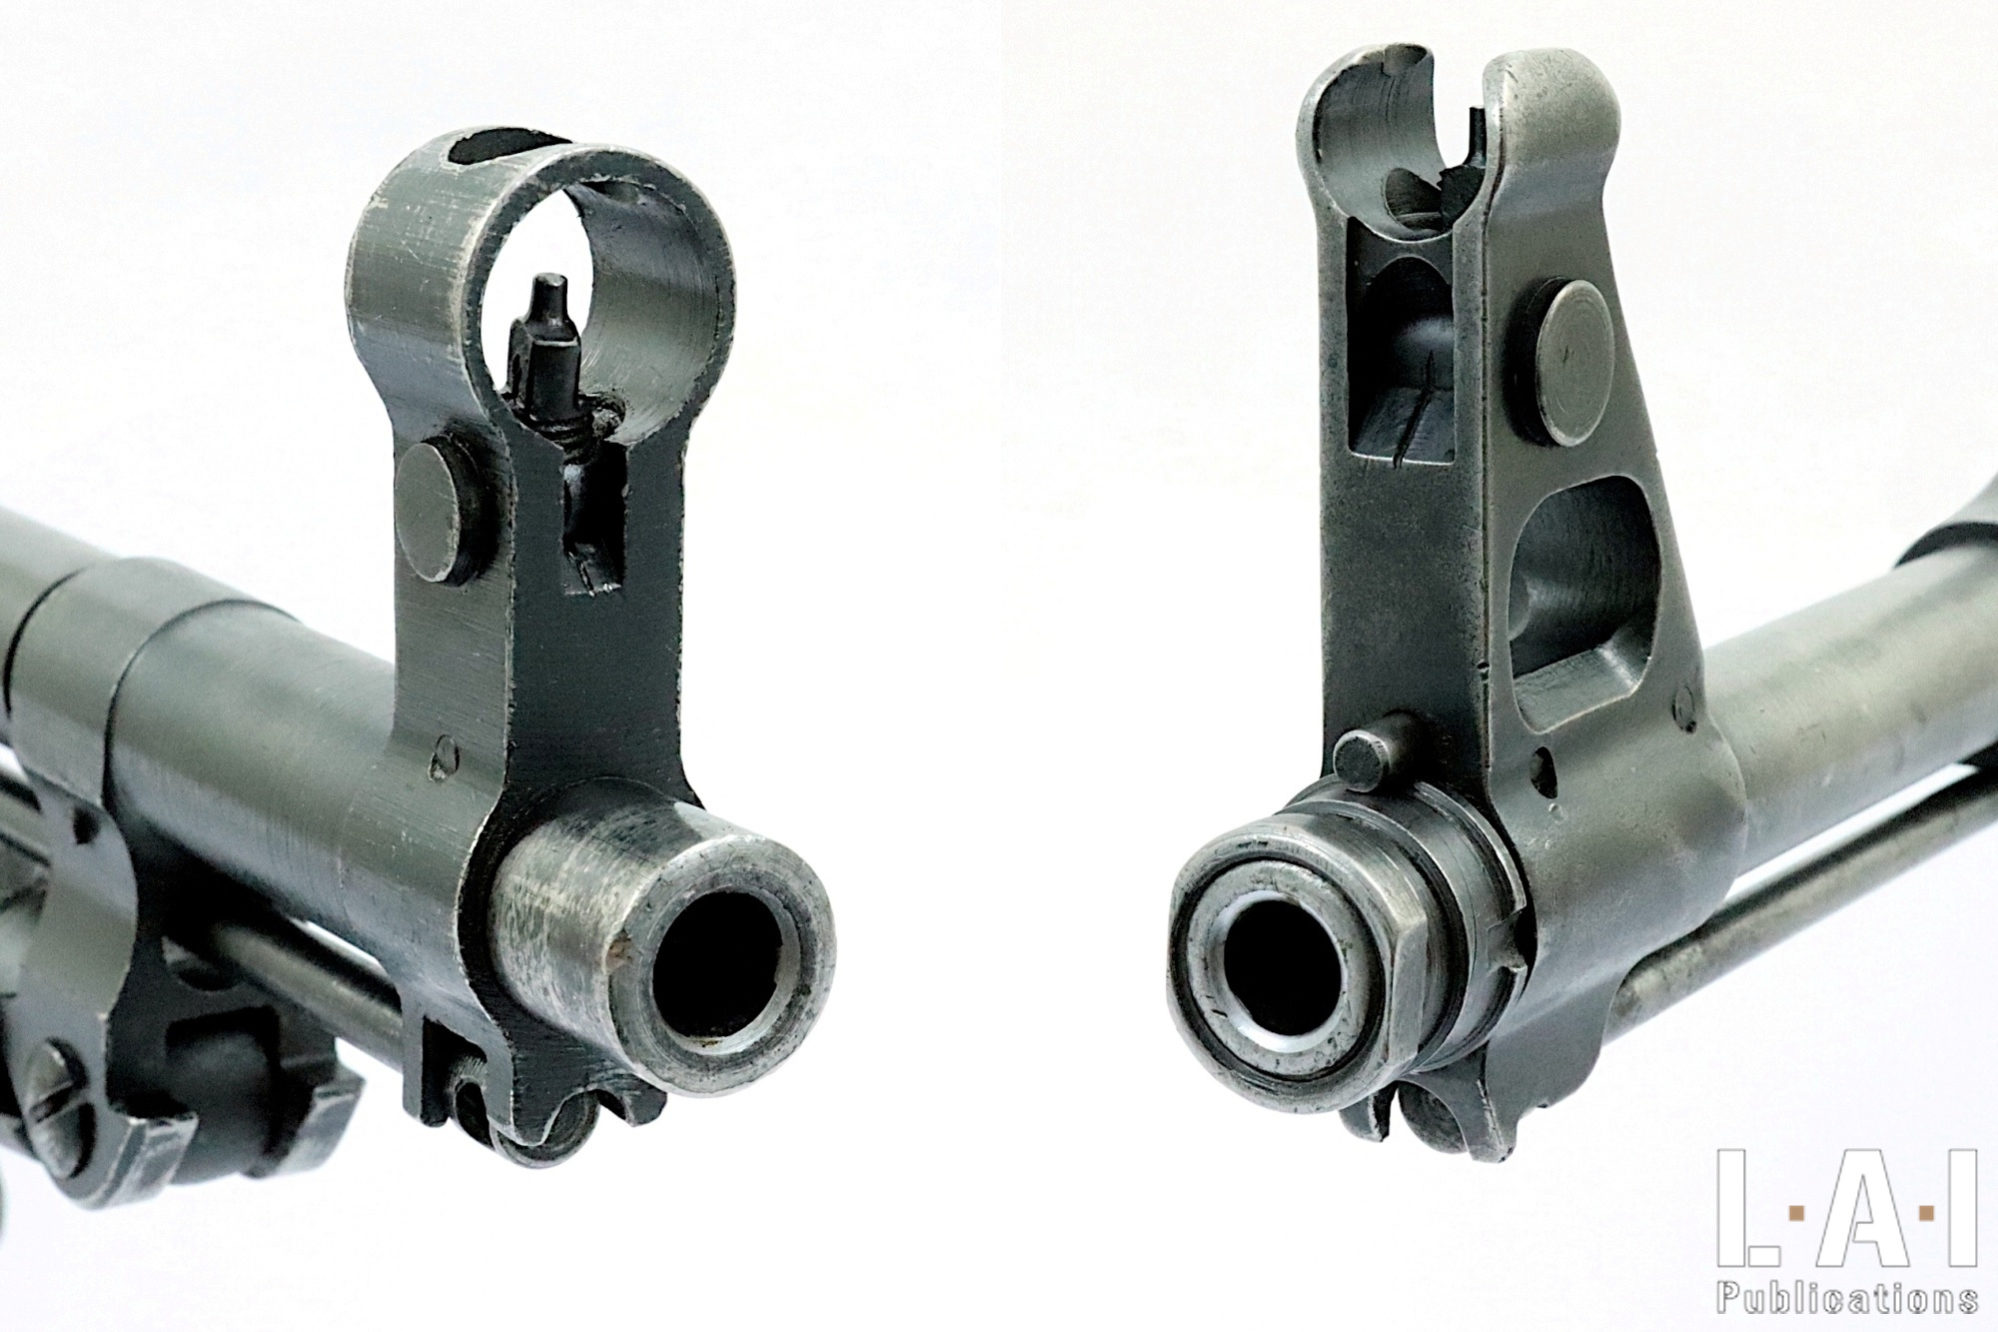
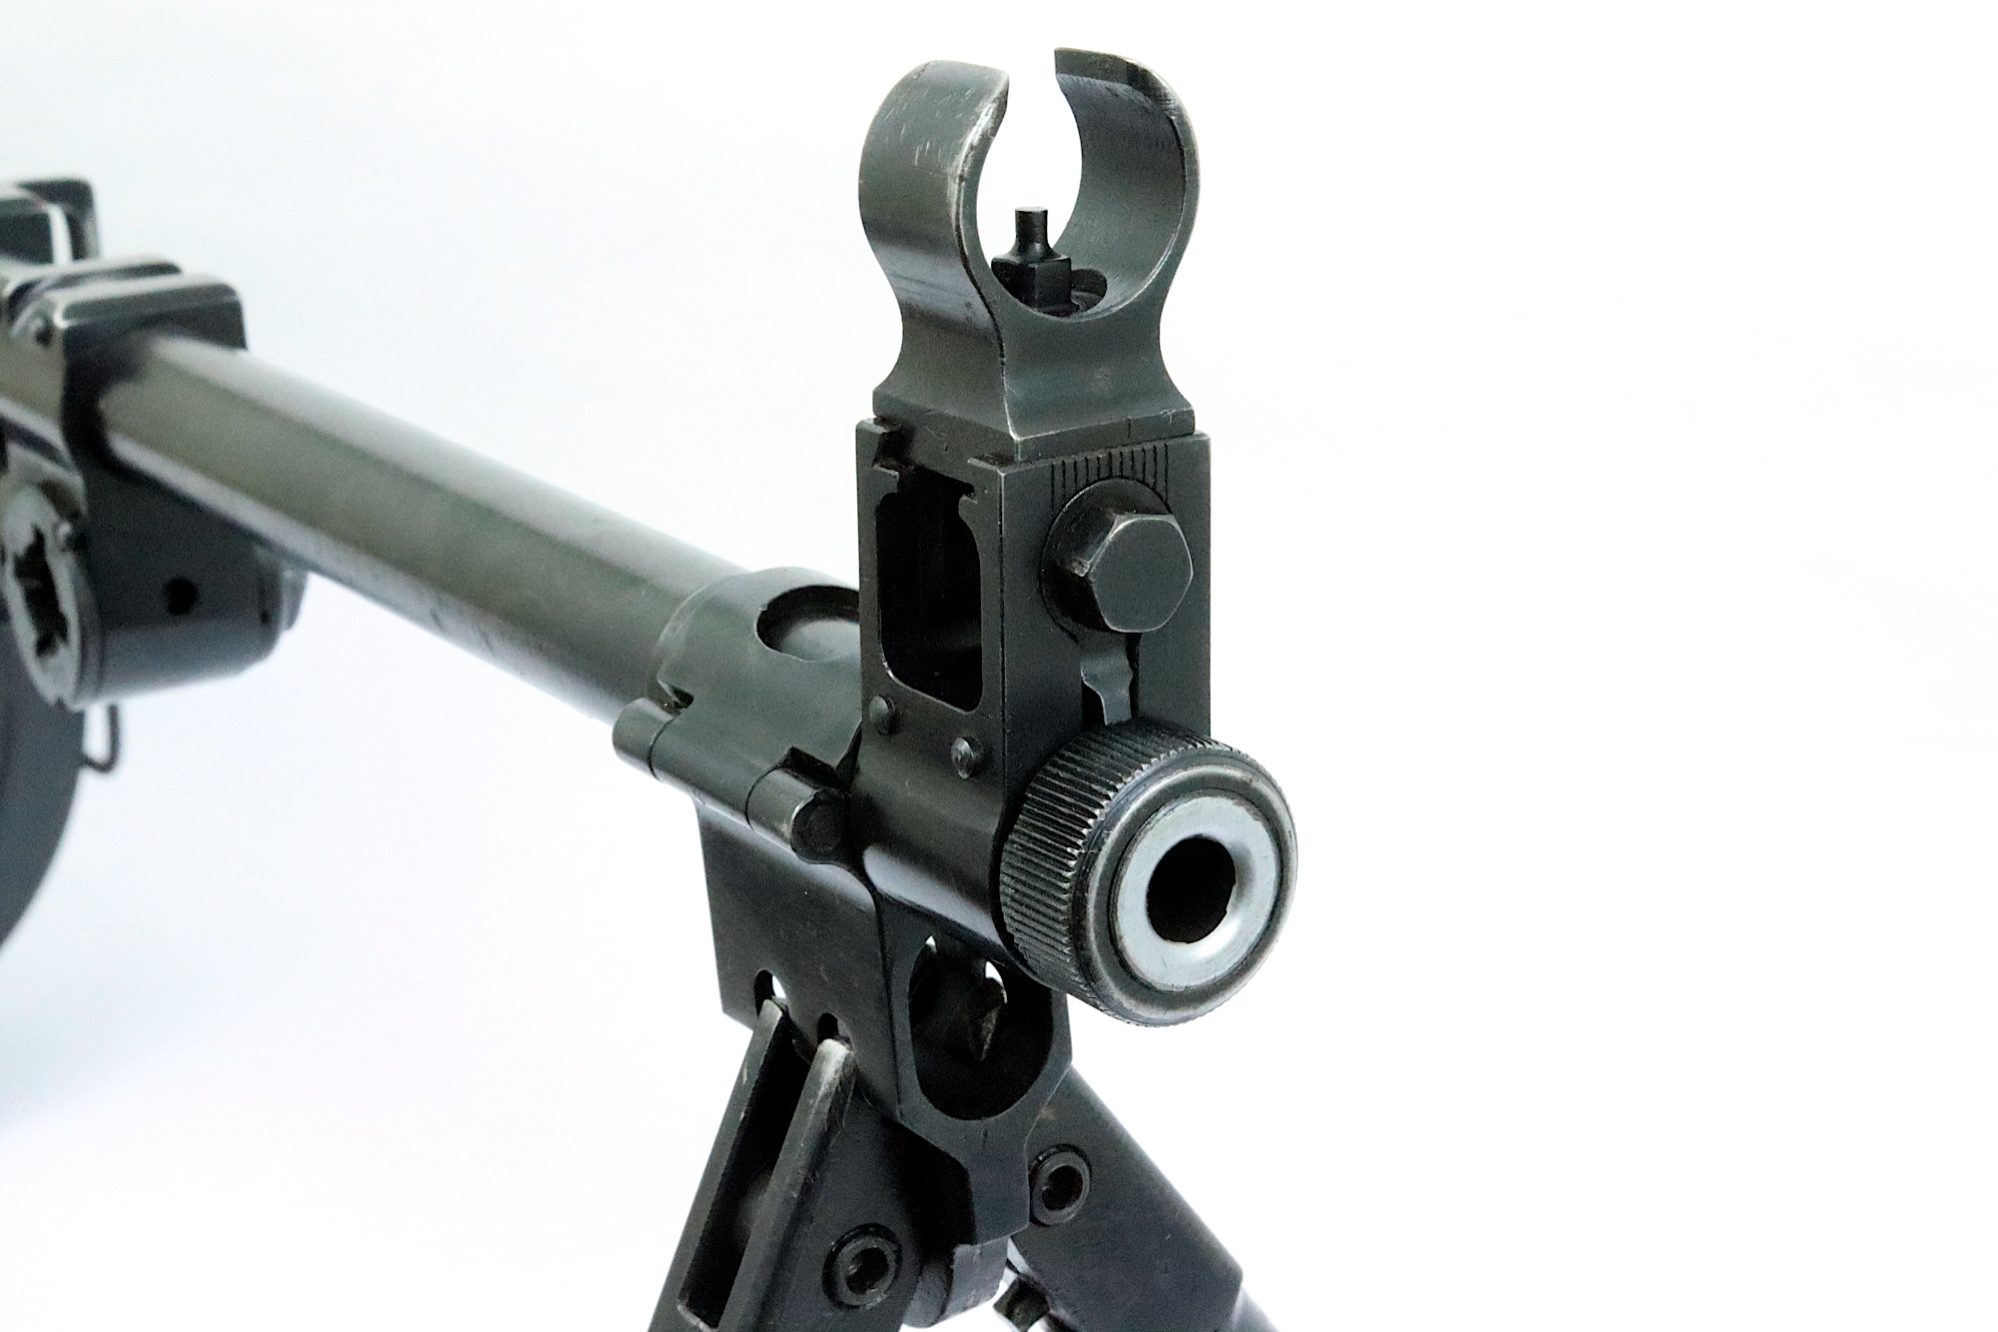
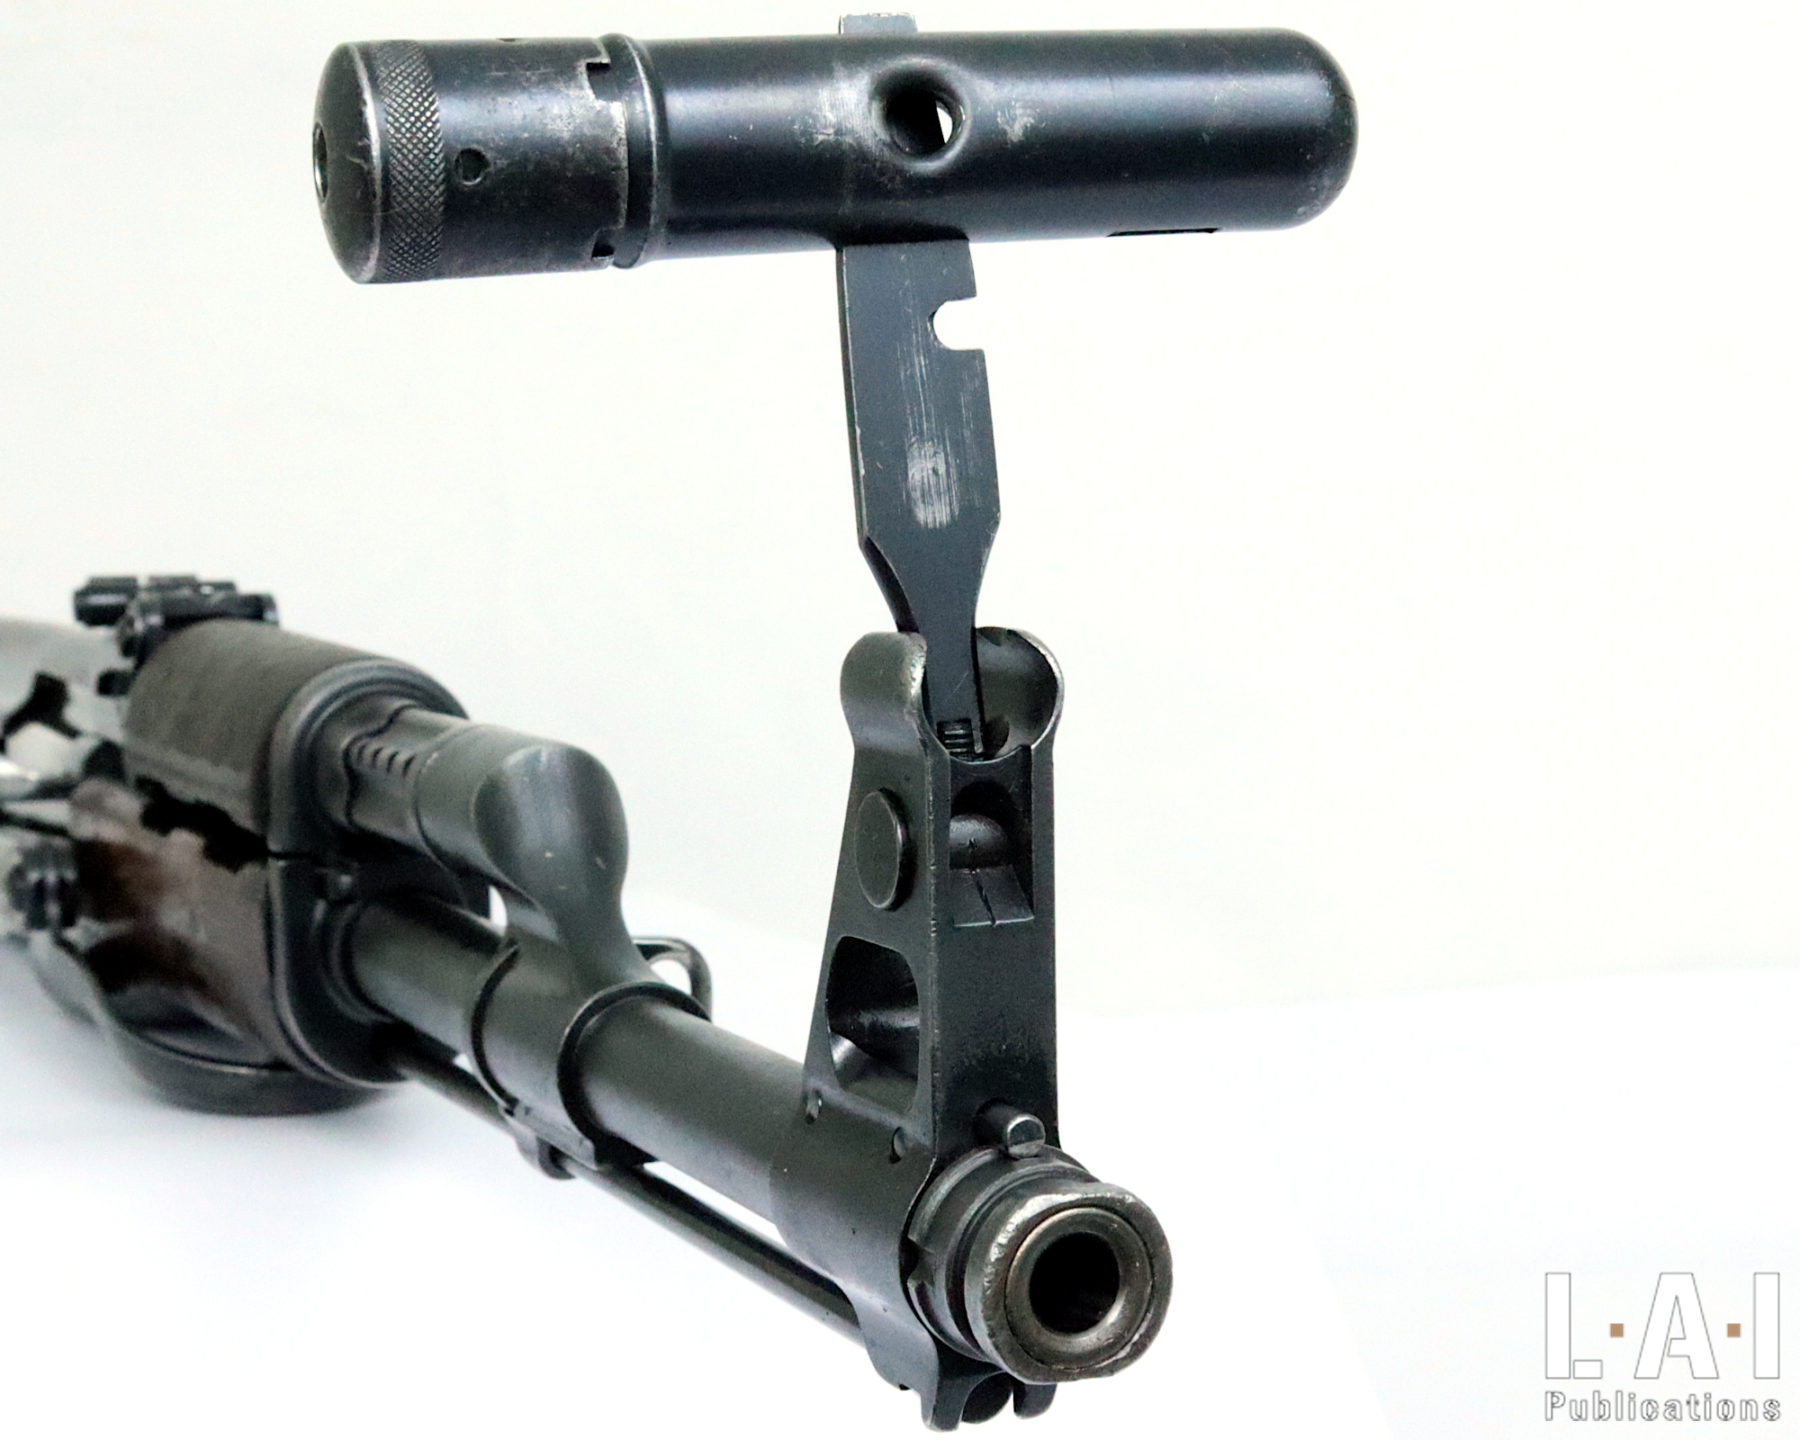
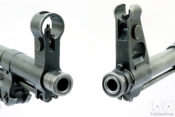
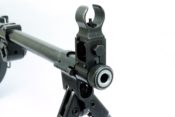
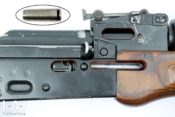
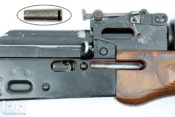
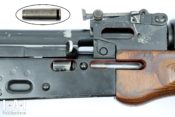
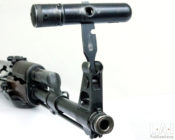
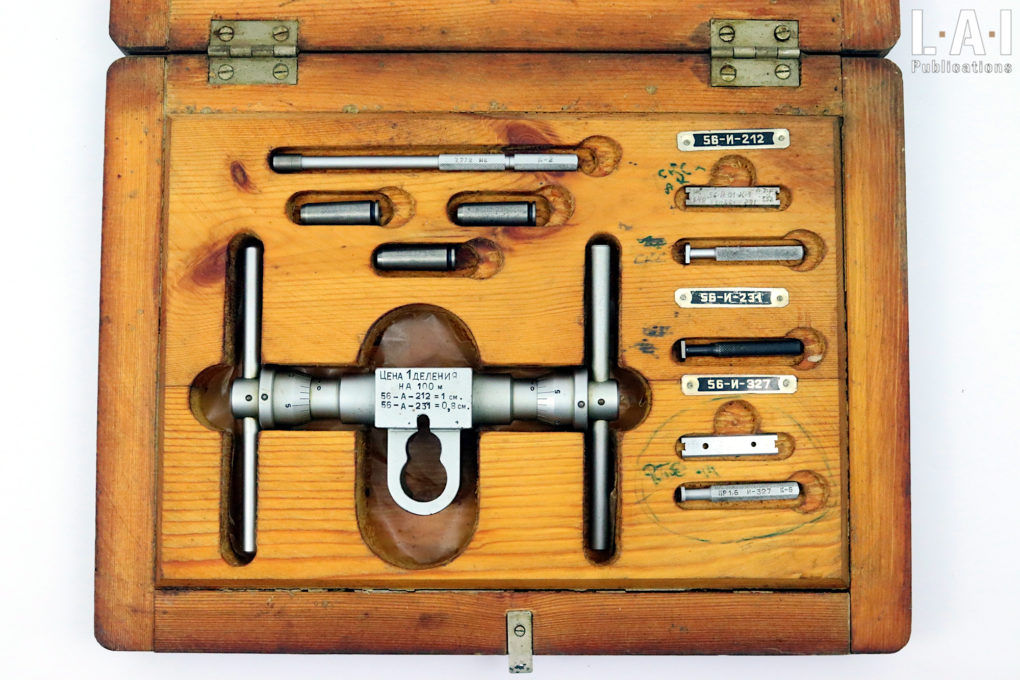
The protocol of use may contain slight differences, but the spirit of these tools remains the same: to control the critical points relating to the operation of the weapons, or even to safety problems concerning the headspaceDistance between the rear support surface of the ammunition ... More gauges. It is no surprise that we find each of these tools in this control box, as well as a magnificent front sight direction-adjustment tool for both SKS-45 and AK-47 (Pics.01 and 02). The latter is compatible with the AKM as well as its derivatives which share the same adjustment arrangements: a cylindrical post support embedded in the turret and a screwed post in this support (Pic.03). However, it is not compatible with the AK-74 or its derivatives, as the diameter of the front sight turret base and muzzle device are larger than the AK-47’s and AKM’s. The third weapon concerned by the box, the RPD-44, has the direction-adjustment of the front sights made by simple sliding after loosening two nuts. It therefore does not require a specific tool (Pic.04). Finally, for the curious out there … the tool is not compatible with Vz.58! The box does not contain any superfluous: direct to the essential in a very … soviet way! The box itself is made of wood, each tool being housed in a suitable milling.
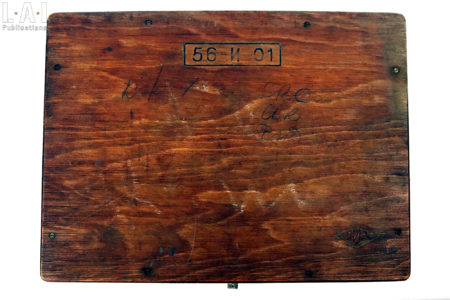
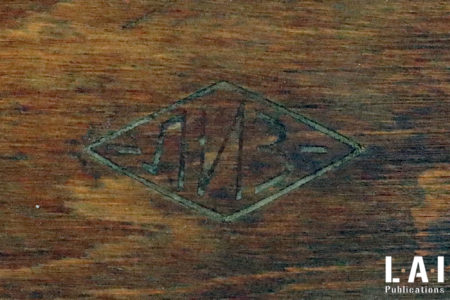
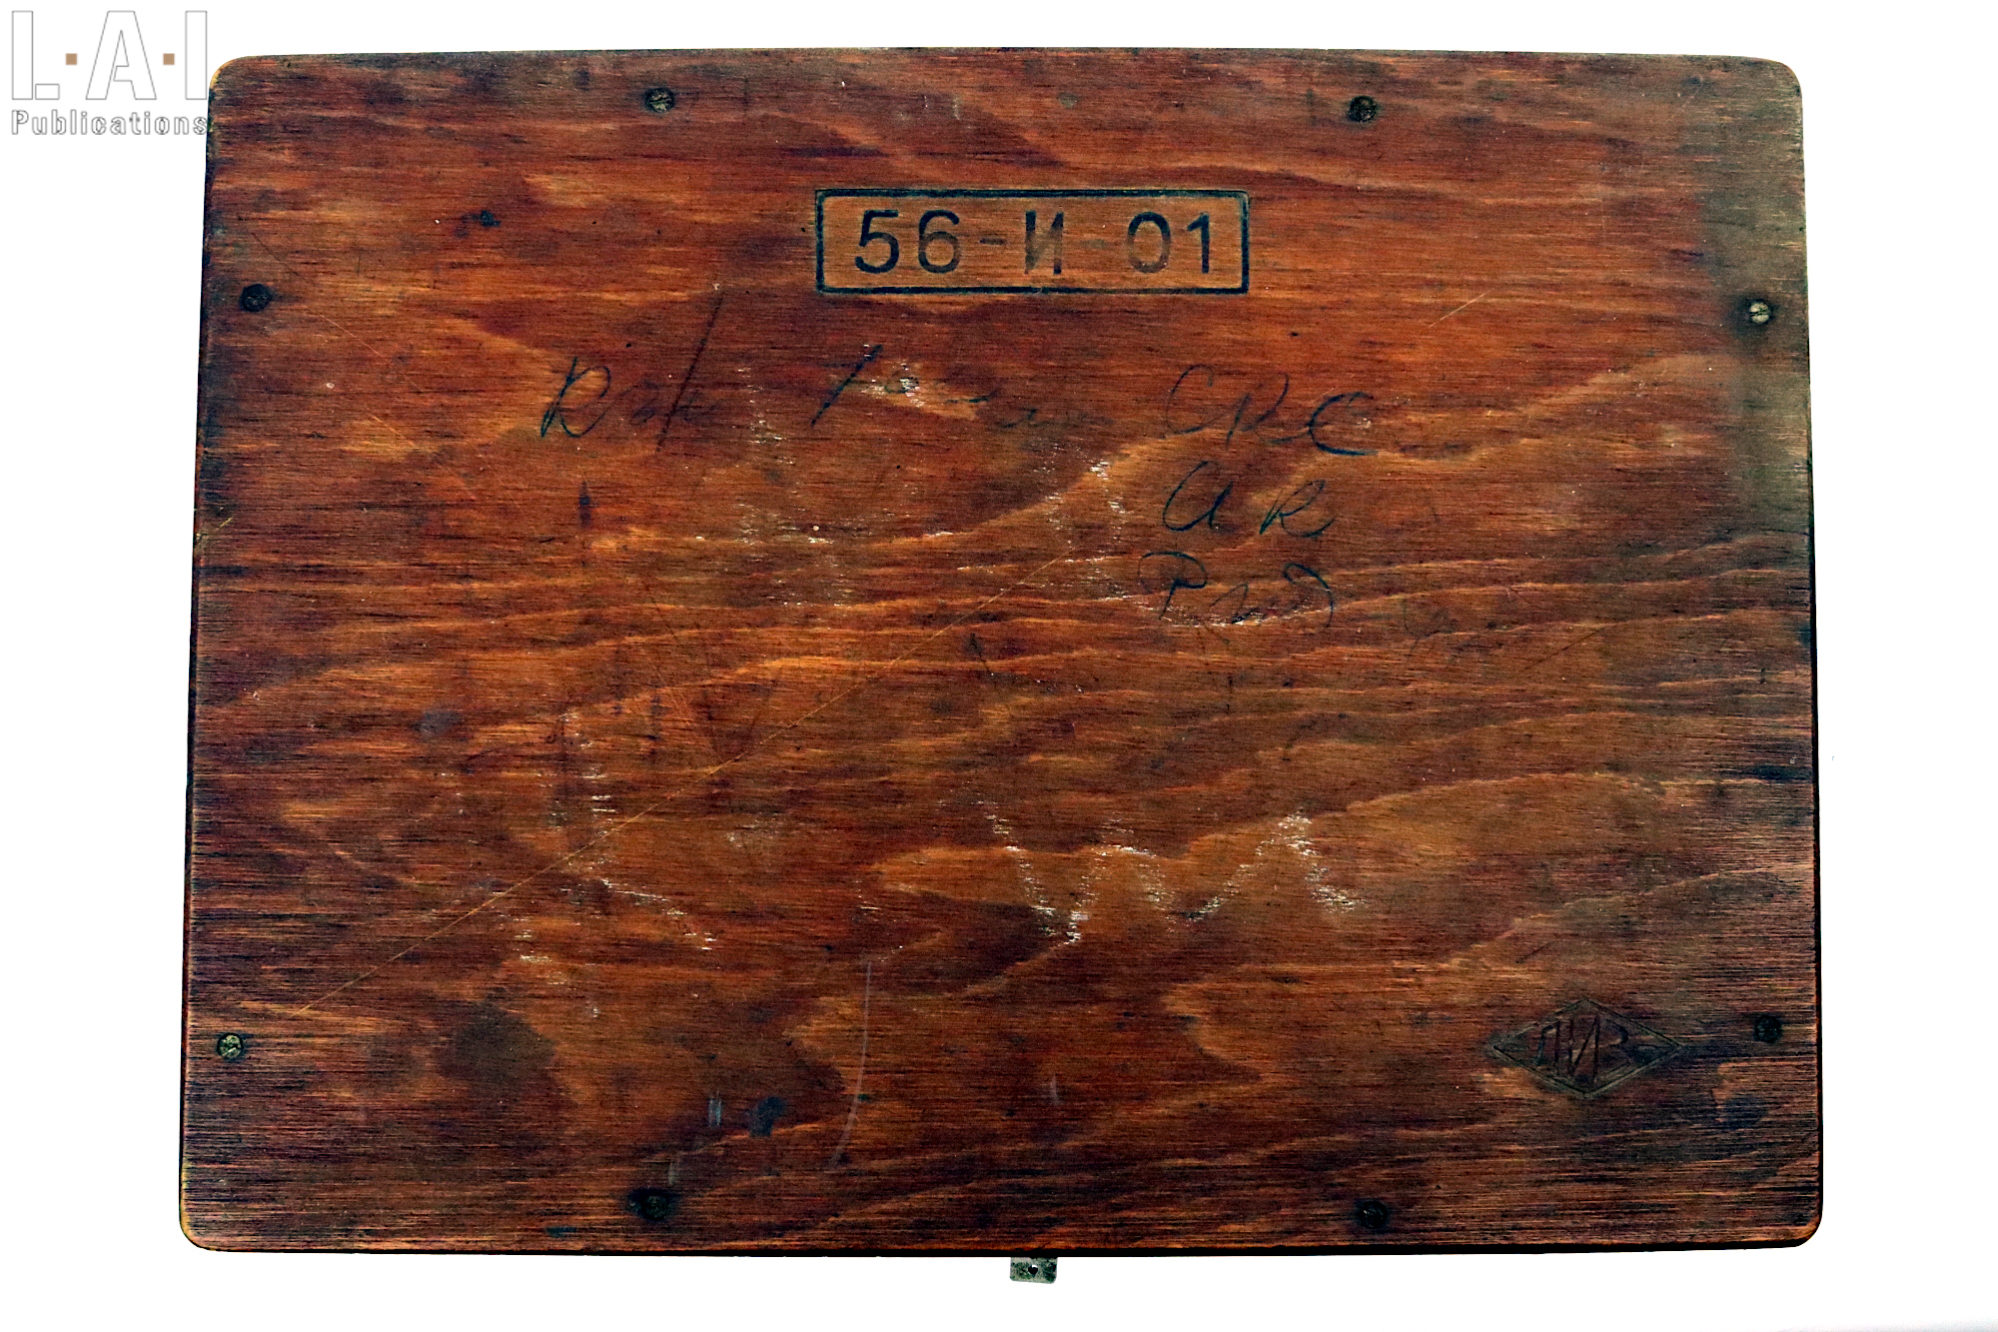
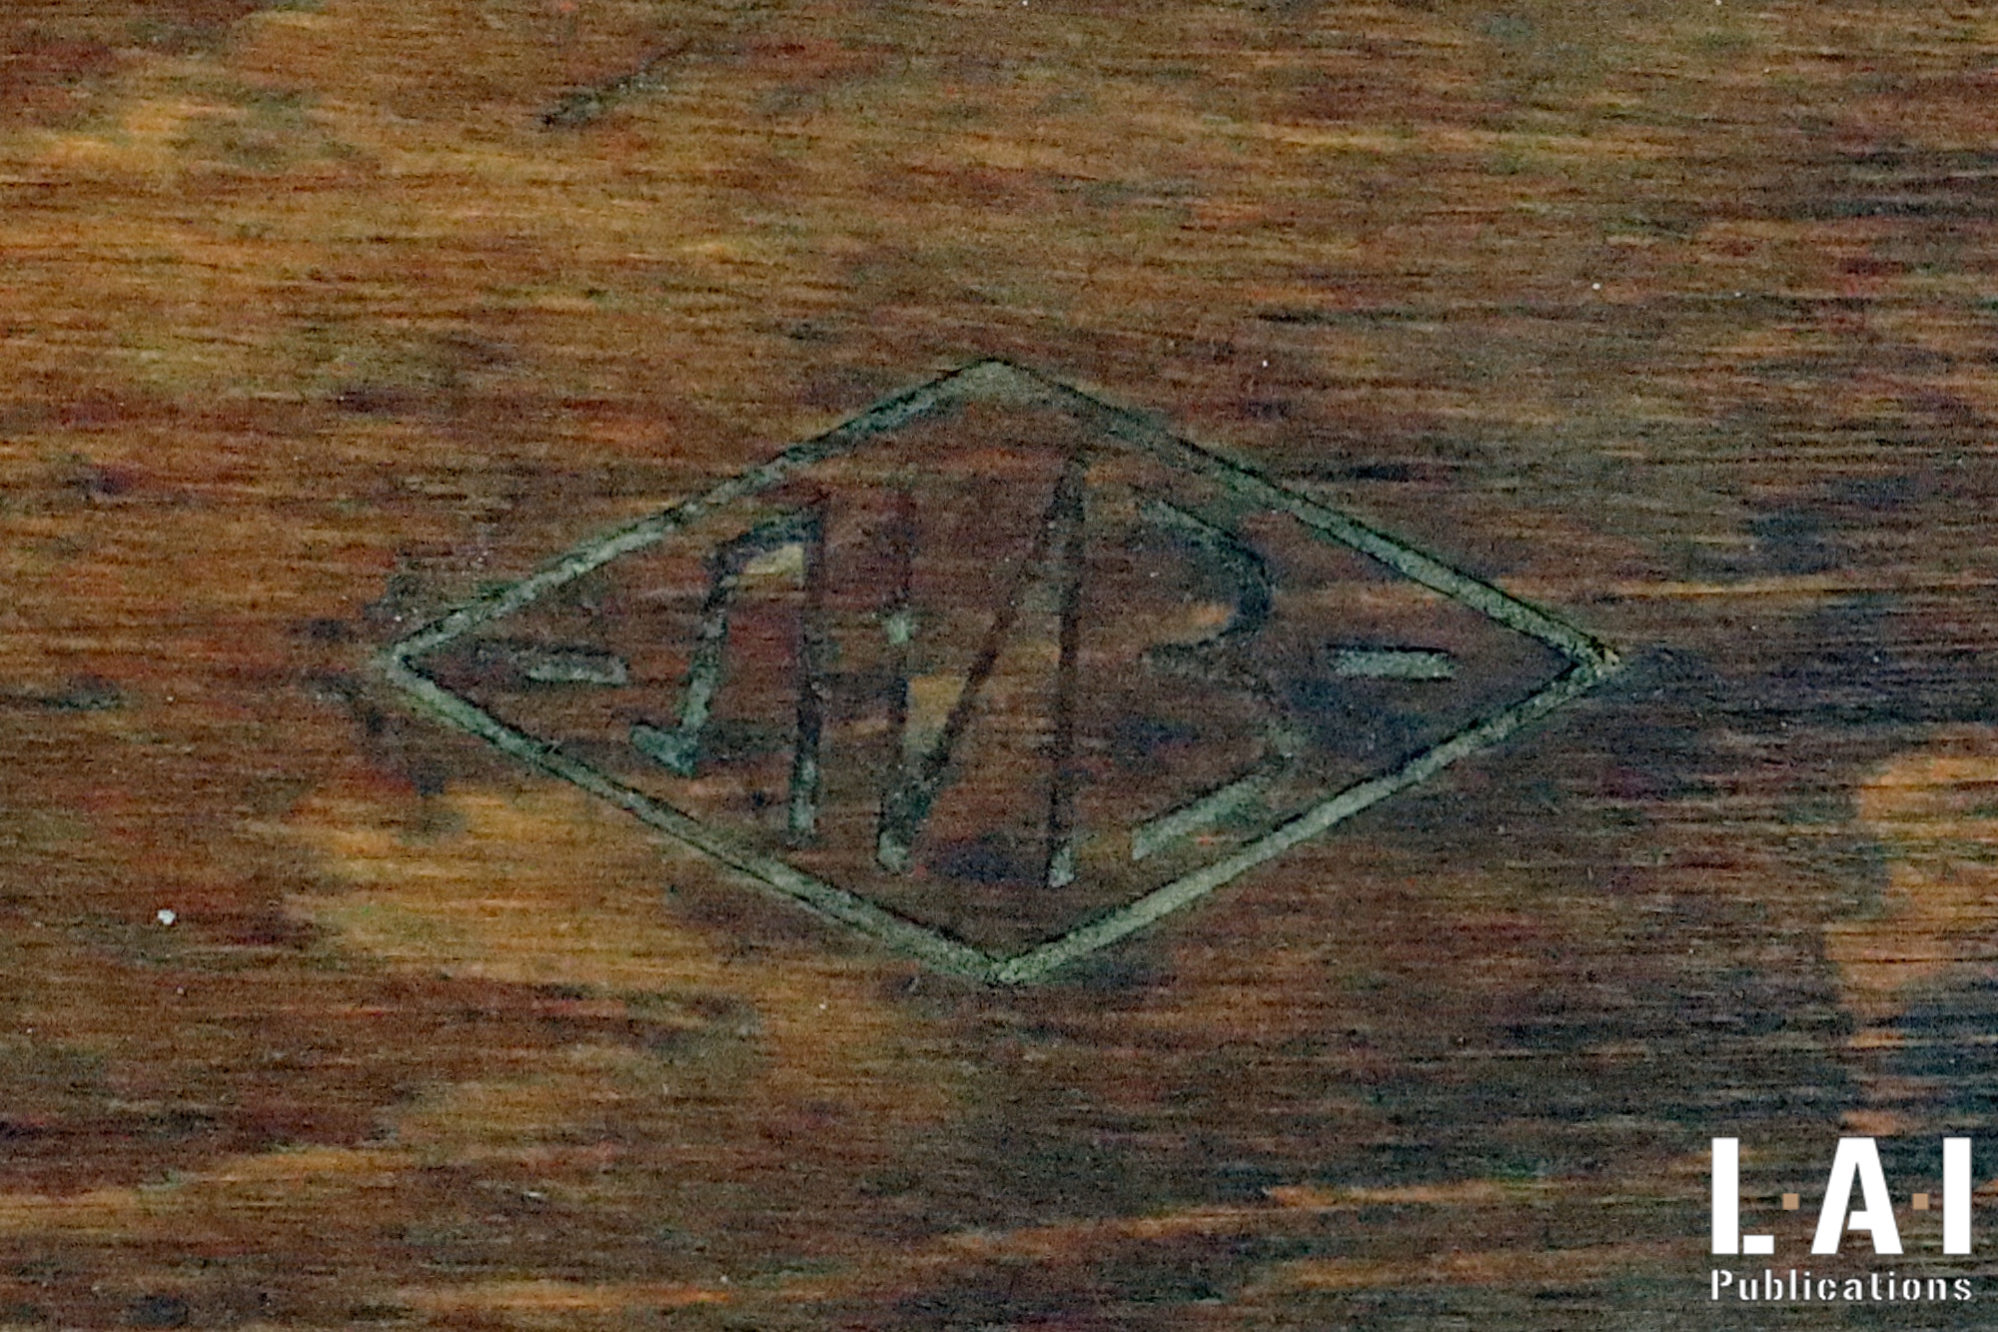
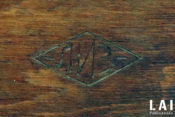
The set was manufactured by the Lozovsky Instrument Factory (Лозовской Инструментальный Завод – ЛИЗ), located in Lozova, Ukraine (Pic.05). The factory was named in honor of Solomon Lozovsky, an important figure in the 1917 revolution and Soviet governance. The box has come to us complete, but some of the tools are not the original ones. This is in no way shocking: in the case of metrology tools, a rigorous dimensional control must be carried out periodically, and in case of non-compliance, the tools must be replaced. This box has probably had a long service life, so it is perfectly normal that some tools have been replaced over the years.
The “Kalibres” and their use
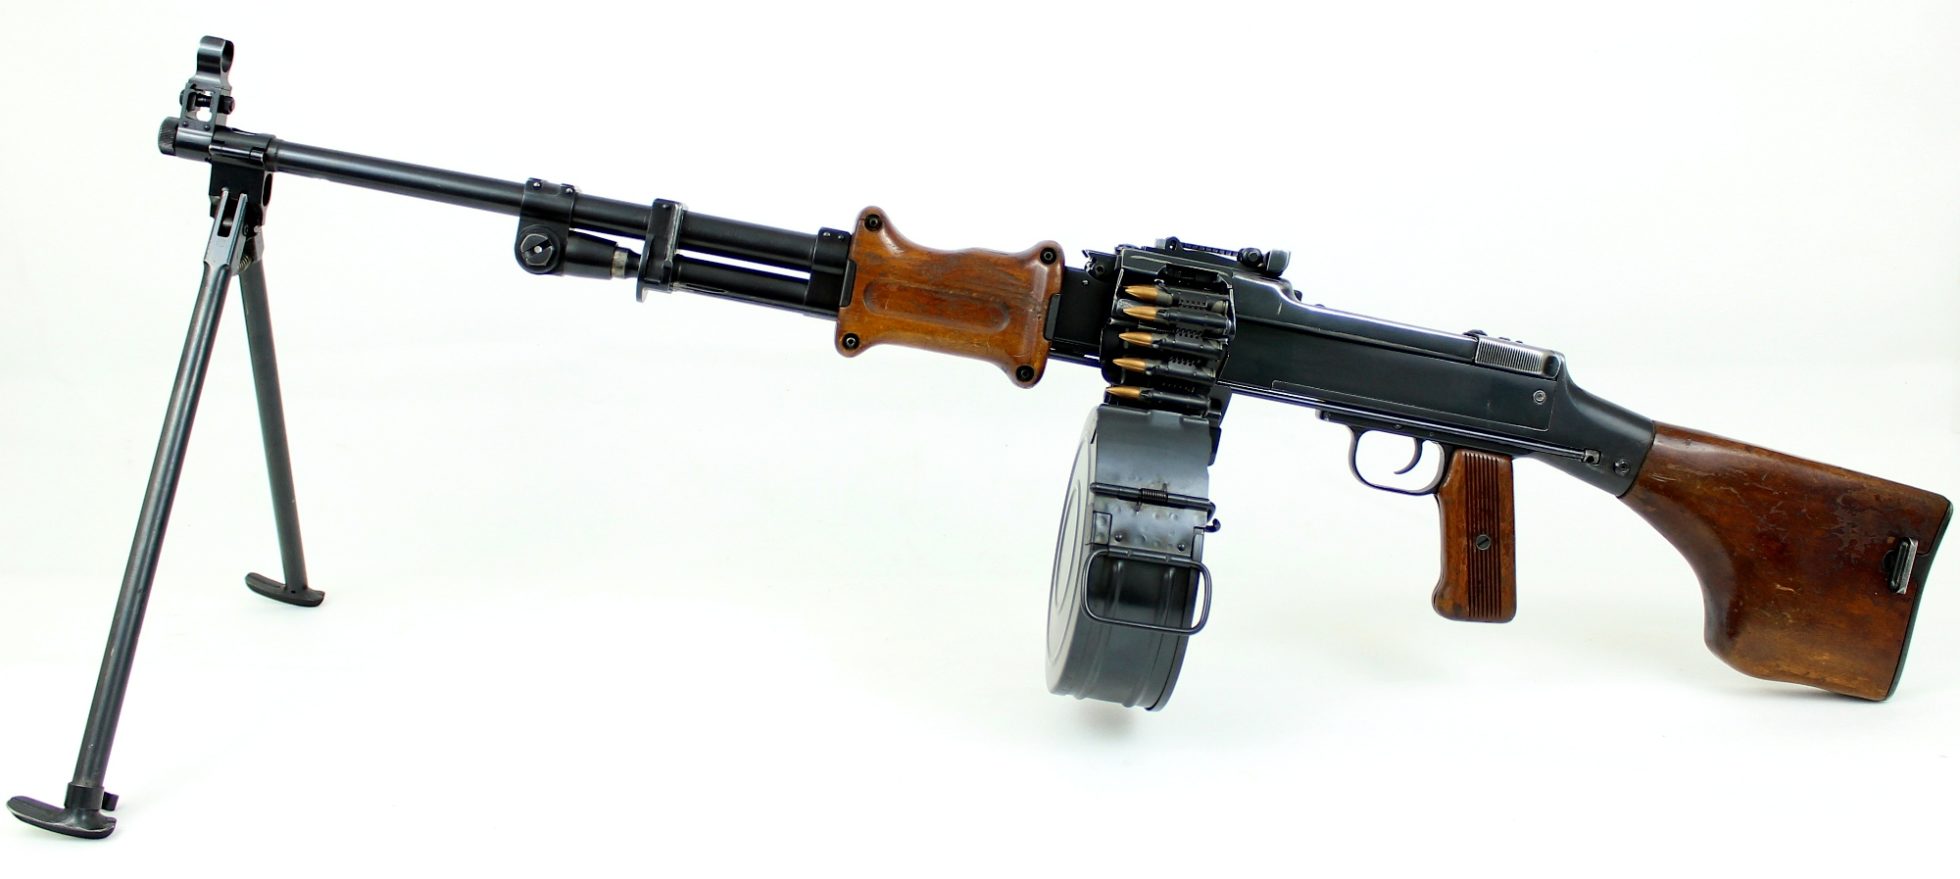
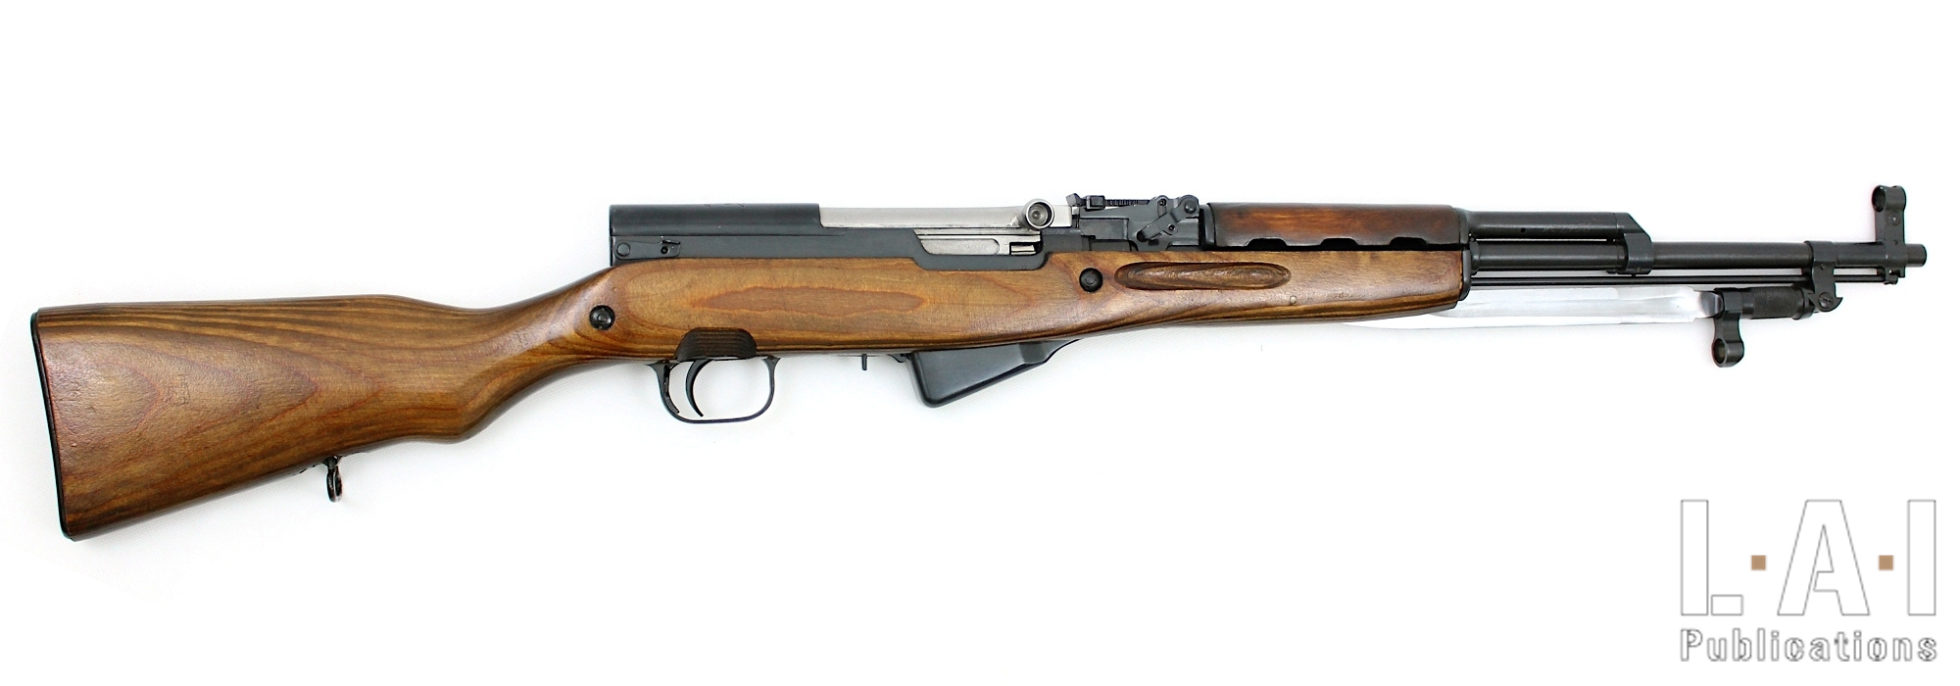
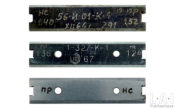
These gauges are called “Kalibre” in Russian (Калибр). The box allows the control of the 3 weapons adopted in 7.62×39 in the aftermath of the Second World War. Using their GAU (ГАУ) indices number, they mention the system of integration used in the Soviet army until 1960, namely:
- 56-А-327 for the RPD-44, referred to as “7.62-mm Ручной Пулемёт Дегтярёва (РПД)” in the service repair manual available at the end of the article (albeit in Russian!) (Pic.06).
- 56-А-231 for the SKS-45, referred to as “7.62-mm Самозарядный карабини Симонова (СКС)” in the service repair manual available at the end of the article (but still… in Russian!) (Pic.07).
- 56-А-212 for the AK-47, referred to as “7.62-mm Автомат Калашникова (АК)” in the service repair manual available at the end of the article (but, as always… in Russian) (Pic.08).
Sometimes the “56-A” of the indices, identifying the reference to the category “automatic and self-loading small arms” is replaced by “56-И” or simply “И”, for the category of “tool and accessories”.
We note that the covered weapons panel as well as the use of the GAU index seems to indicate that the set is dated before the 1960s. Indeed, at the end of the 1950s, USSR will begin to standardize small arms which will lead to discarding the use of the SKS-45 by the armed forces (in favor of the generalization of the AKM) and to the replacement of the RPD-44 by the RPK (very close to the AKM). Similarly, in the early 1960s, the GRAU index (ГРАУ) replaced the GAU index.
These “Kalibres” are numbered from 1 to 6, with their control value inscribed accompanied by the mention “ПР” for “Проходной” (“acceptable”, which we will call by habit and for more clarity “GO”, “НЕ” for “Непроходной” (“not acceptable”, which we will call “NO-GO”)) or “БР” for “Браковочный” (“with a defect”,” which we will call “REJECT “) for the K-5 gauge (we will come back to this). It should be noted that the use of control tools is only understood on a clean and degreased weapon… like all visual inspection operations that probably are at least as important as the use of tools like this.
It can be destabilizing for the uninitiated to find two types of gauges, which at first glance seems to indicate a refusal during the control. It is necessary to understand here that the control of a weapon (or any other mechanical system) can be done according to at least two reading prisms:
- At the exit of the production line or at the time of a repair: it is then necessary to check, not only that the dimensions are good, but also to consider them in view of their life expectancy of the weapon. Thus, it is necessary to use gauges to guarantee an acceptable service life: therefore, more “tight” gauges.
- During the operational life of the weapon: it is normal that certain dimensions change (wear by friction or settlement of materials for example). It is then necessary to check that the weapon does not reach dimensions incompatible with safe and reliable use without requiring that the weapon remain “in like-new condition”.
The thing is therefore assessed with regard to the “life expectancy” of the weapon with a maximum of pragmatism. This results in different refusal gauges: “NO-GO” for new or newly repaired equipment, and “REJECT” for operational equipment.
K-1: firing-pin protrusion gauges
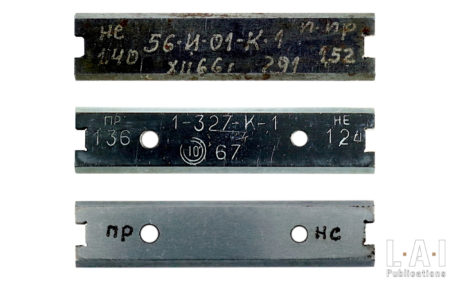
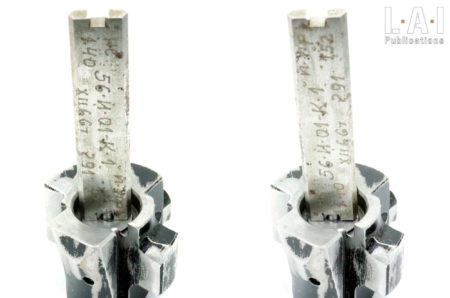
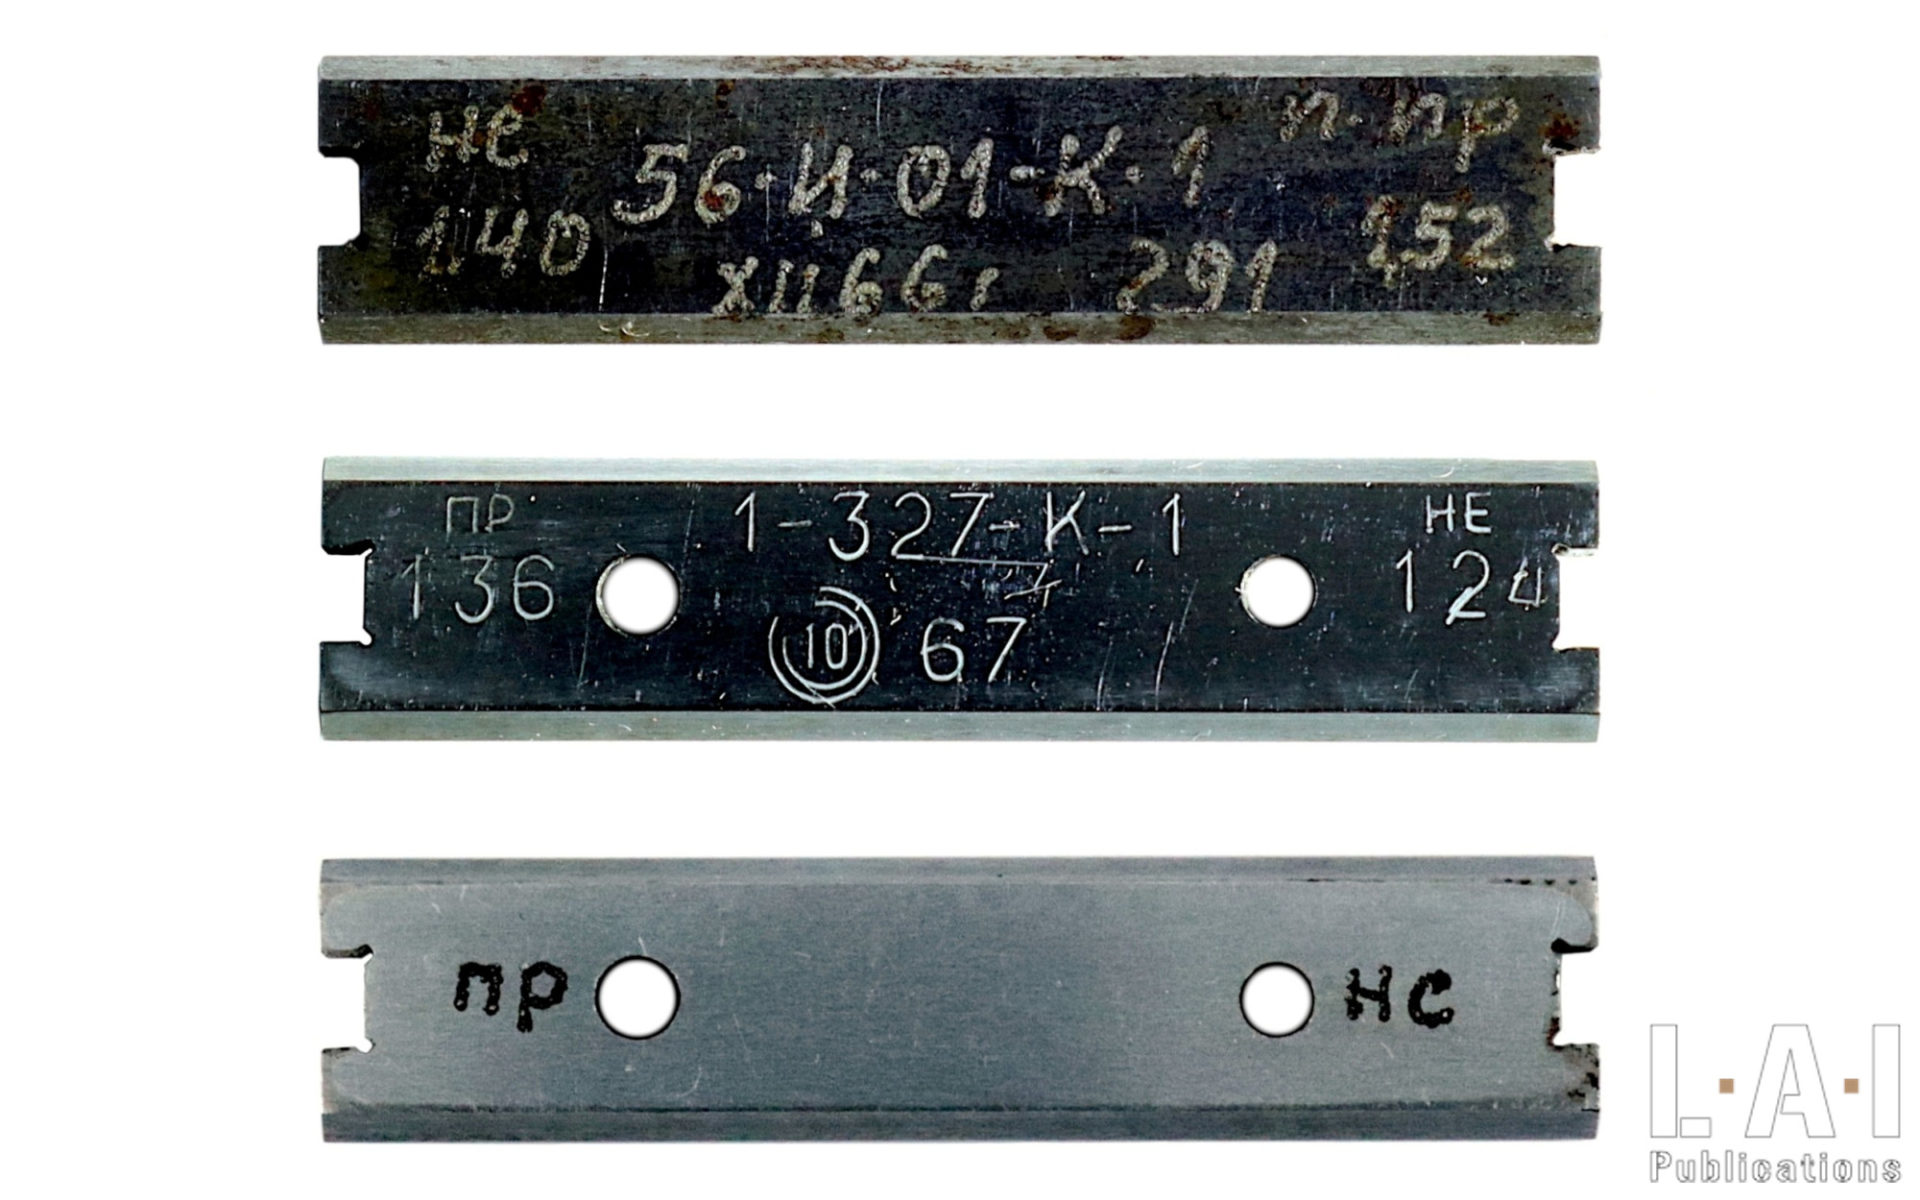
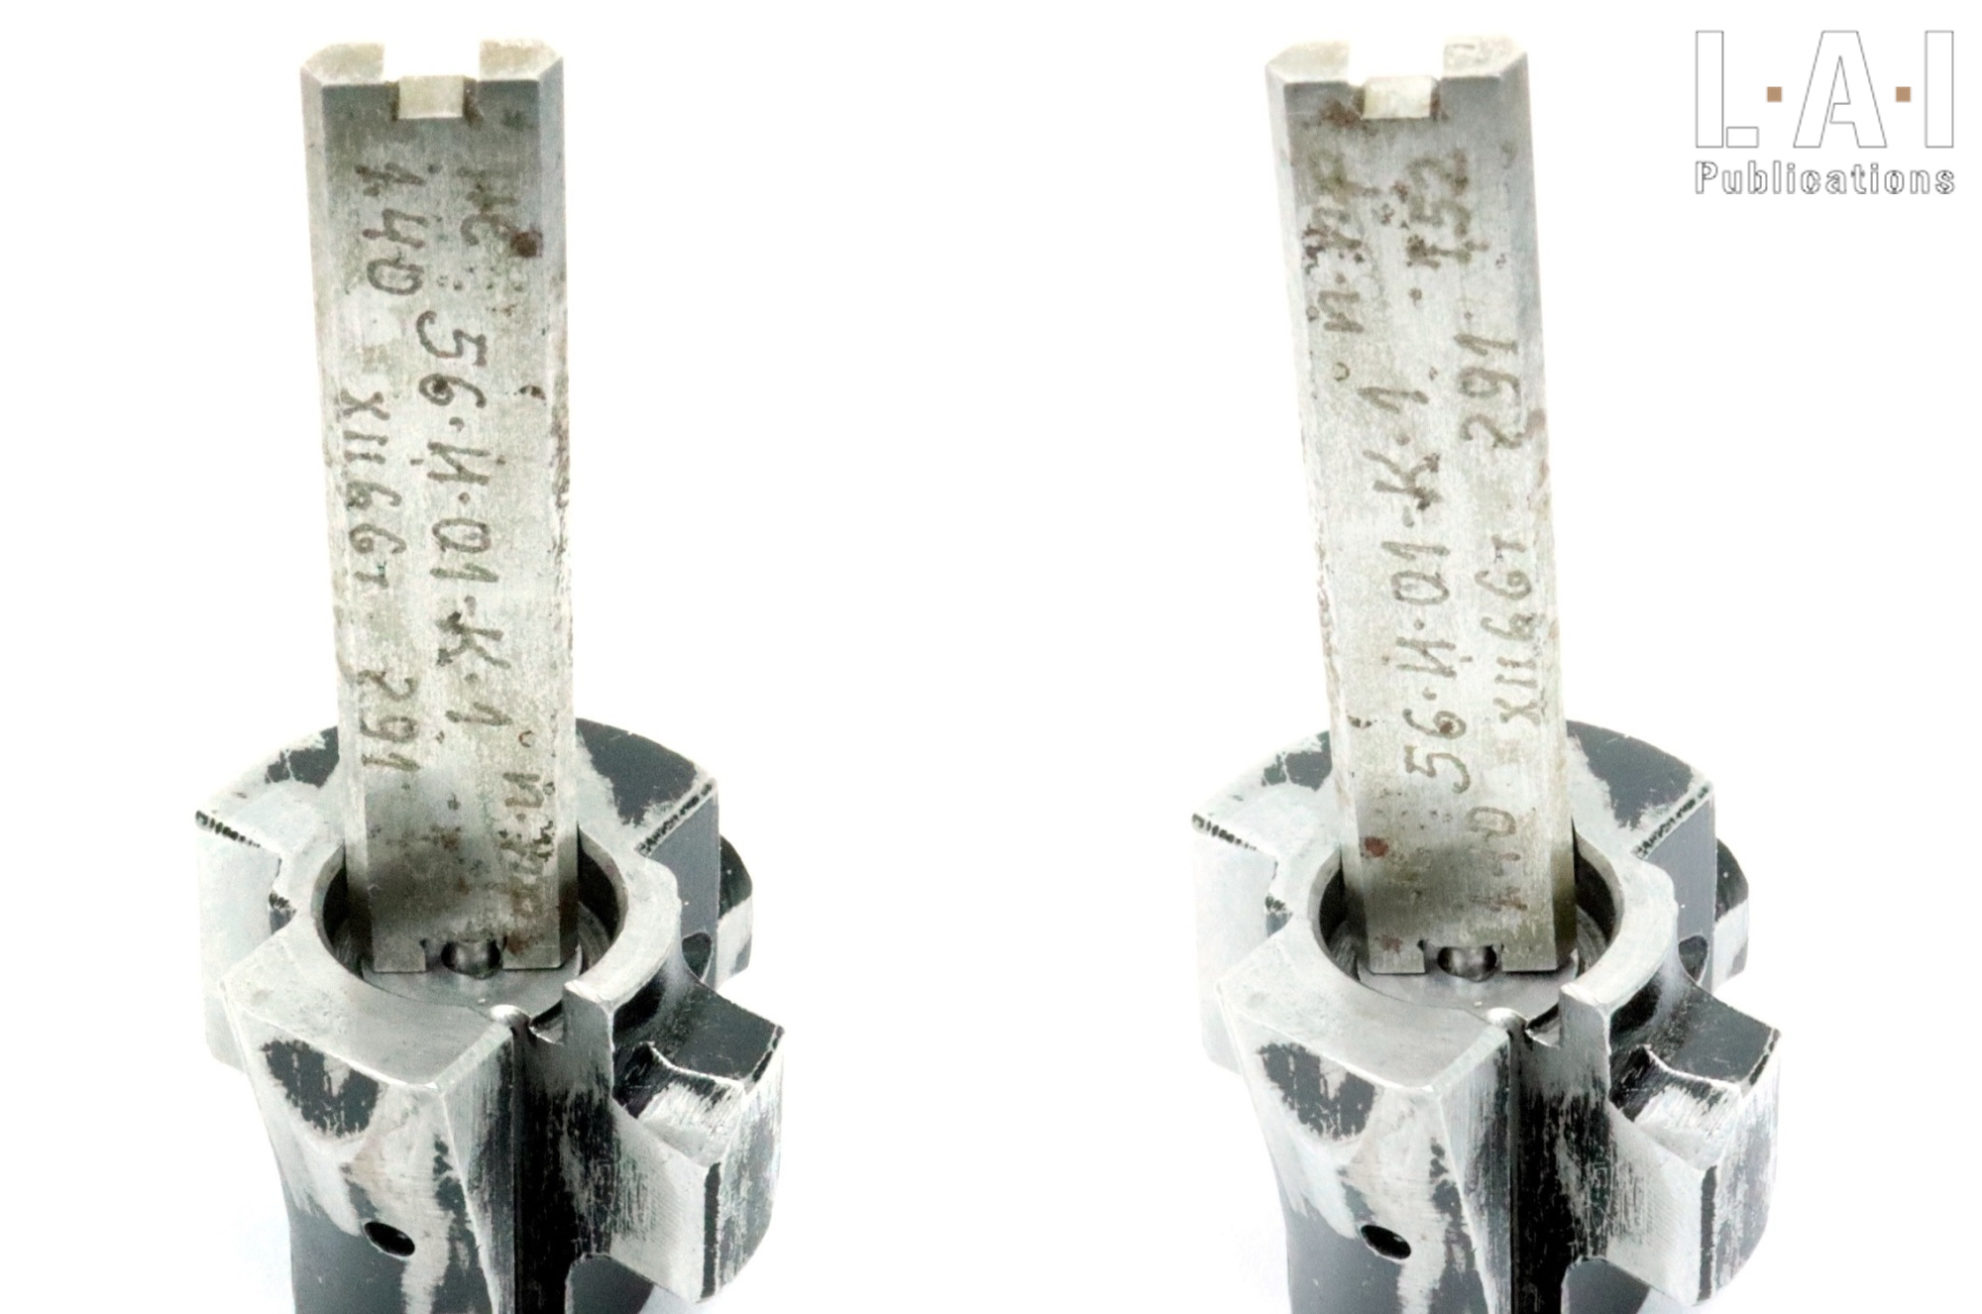
The case contains two tools dedicated to this verification (Pic.09):
- One for the 56-И-327 (RPD-44) with the control value: GO = 1.36 mm and NO-GO = 1.24 mm. The example in our possession also has two orifices: one of 2.3 mm (NO-GO) and one of 2.6 mm (GO). Despite our research, we have not found the vocation of these orifices, which seem only present on this Bulgarian variant of the gauge.
- One for the 56-И-231 / 56-И-212 (SKS-45 and AK-47) with the control value: GO = 1.52 mm and NO-GO = 1.40 mm. Some technical instructions notify a “GO” value of 1.6 mm, but we find the 1.52 mm value in the repair manuals of 1958 available at the end of the article.
This gauge is used to verify that the firing-pin produces in the bolt faceThe bolt face is the part of the bolt which in set place the... More:
- Sufficient protrusion to initiate the primer of the ammunition.
- A non-excessive protrusion so as not to perforate the primers.
Using K-1
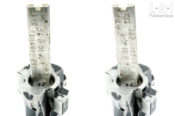
The firing-pin is positioned in maximum protrusion inside the bolt faceThe bolt face is the part of the bolt which in set place the... More (Pic.10):
- When the tip of the firing pin is positioned in the “GO” notch, the entire rear end of the gauge must be in contact with the bolt faceThe bolt face is the part of the bolt which in set place the... More: this is the maximum protrusion of the firing-pin.
- When the tip of the firing-pin is positioned in the “NO-GO” notch, the rear end of the gauge must not be in full contact with the bolt faceThe bolt face is the part of the bolt which in set place the... More: this is the minimum protrusion of the firing-pin.
If the check indicates a defect, it does not automatically order the replacement of the firing-pin! It simply indicates an anomaly: it must lead to further investigation that must lead to corrective action, of which the replacement of the firing-pin is only one example. In this case, a primer burst stuck at the bottom of the firing-pin channel can quite be the cause of a minimal non-compliant protrusion… and replacing the firing-pin won’t change that.
Maintenance operations should never be the result of automation or mindlessly replacing some parts, but of understanding the phenomena.
K-2: Barrel wear gauge
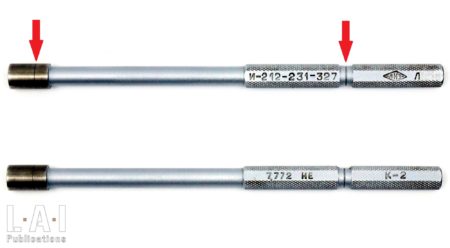
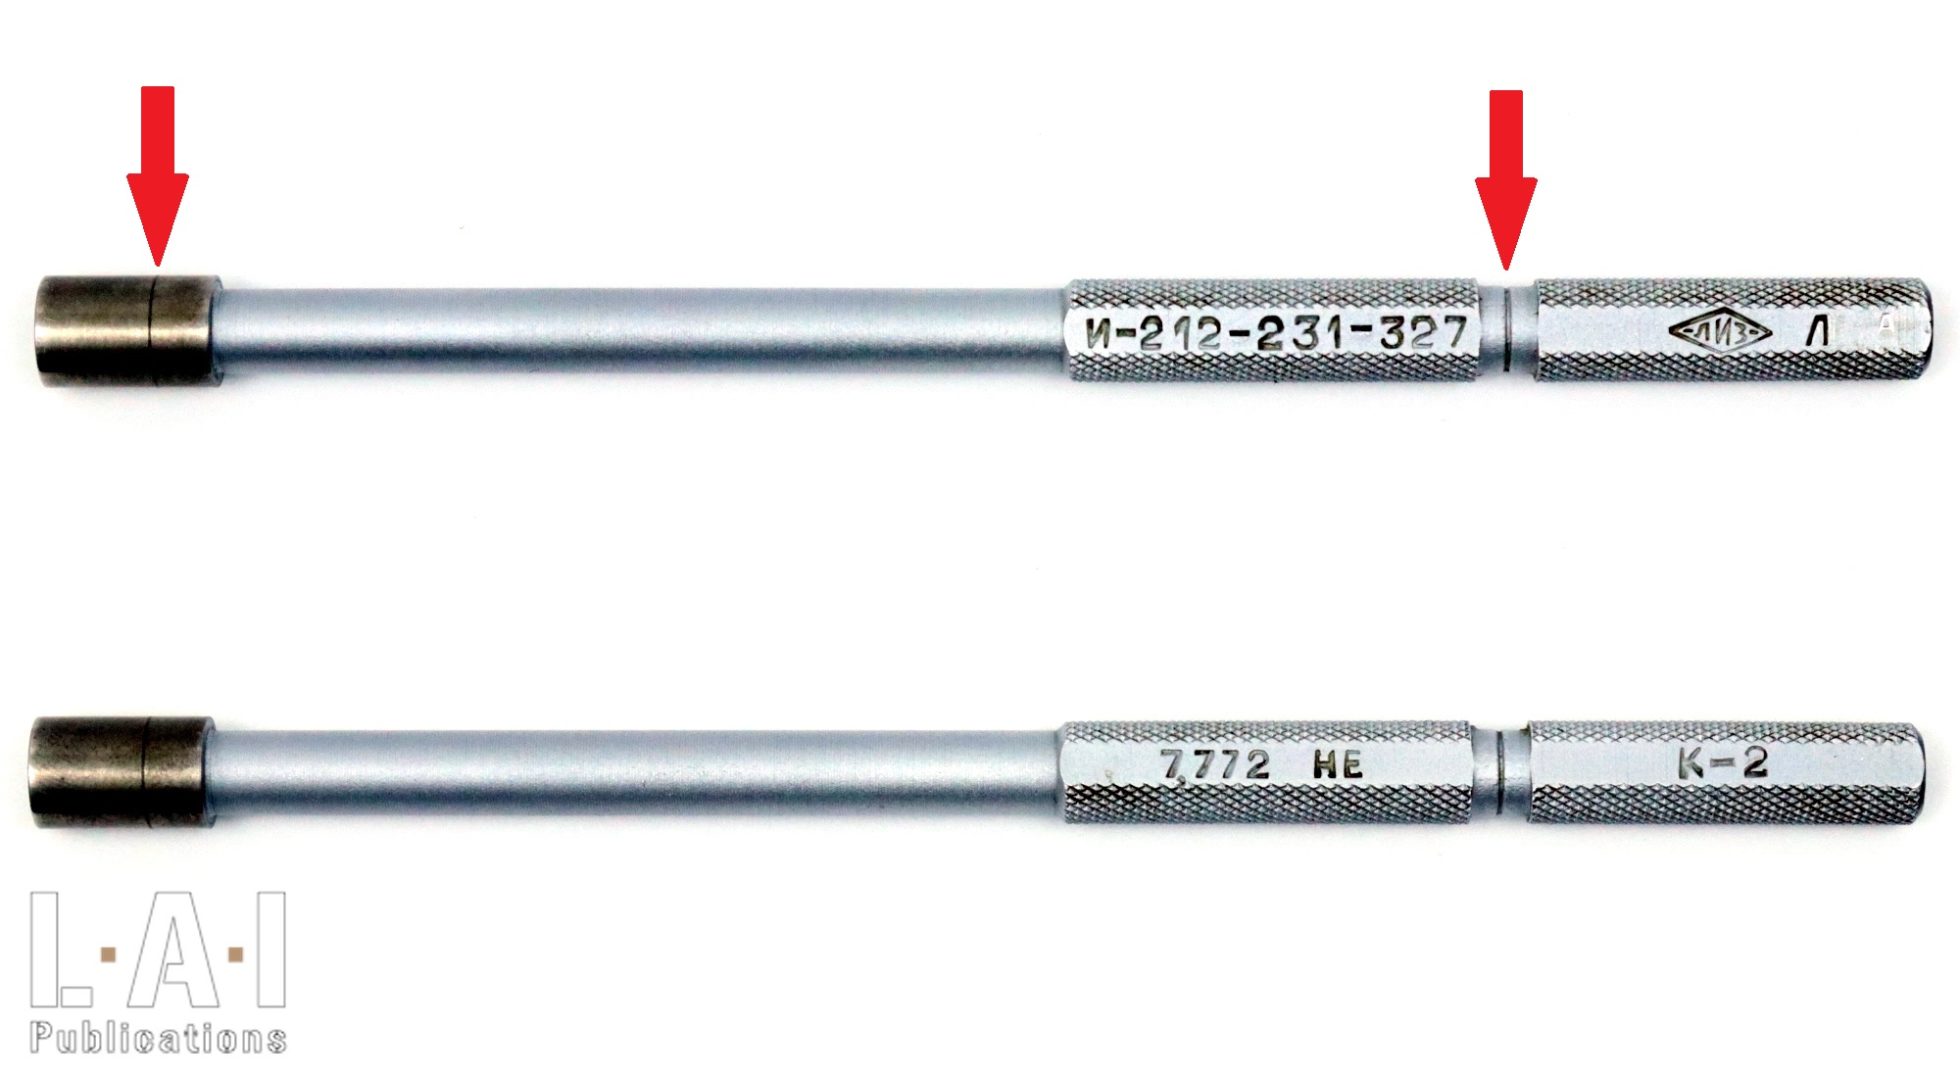
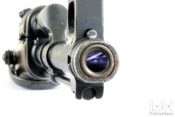
This works by measuring the bore diameter in between lands, with a value of 7.772 mm (Pic.11). It will be reminded here that the CIP gives the value of the diameter of the barrel 7.62 in between lands and 7.92 in between grooves (value to which it is obviously necessary to add tolerances). The gauge therefore allows a wear of nearly 0.152 mm … but over a very short distance as we will see. The gauge is, logically, common to the three weapons. In fact, it is identical to the one used on the Mosin-Nagant… and for good reason, the barrels of these calibers 7.62×54 R and 7.62×39 normally have the same internal dimensions on their rifled part … as well as those in 7.62×25! Industrial pragmatism…
For some unknown reason, the tool has on its knurled part, a mark that corresponds exactly to 100 mm in length from the ground surface end. (Surface or cylindrical grinding is a method of machining that allows the obtaining of very precise dimensions as well as a very regular surface finish … therefore particularly compatible with the realization of gauges).
Before mentioning here the use of this tool for the verification of the barrel, it is necessary to keep in mind that the main criteria for evaluating a barrel are:
- its internal surface condition: absence of oxidation, in the chamber as in the bore, absence of deformation (bugling, crushing, bending) … This control is carried out visually, with and without dedicated tools. Once again, beware of the use of certain inspection tools (we are thinking in particular of the borescope): it sometimes highlights defects (and not damage) that are not incompatible with the use of the weapon… we can never say it enough: stay pragmatic.
- its accuracy: this accuracy can be seen in the… shooting! Thus, for each of the weapons concerned, the service manual tells us that the accuracy is acceptable if the group of 4 shots is part of a 15 cm circle to 100 m … while tolerating one “flyer” (i.e. a bullet that comes out of the group), which is presumably attributed to the incompetence of the shooter in the spirit of the Soviet manual. A very wise precaution… Professionally, the majority of cases where weapons were reported to us as “inaccurate” were actually related to a lack of control of its user.
- the weapon’s operation: the condition of the barrel (of its chamber, of its bore, but also of its gas port(s) if applicable) can impact the functioning of an automatic weapon. The verification is done once again by shooting, but by observing protocols that favor the emergence of breakdowns or by measuring the cycle-rate. Once again, this type of control is not done arbitrarily or by chance, but with knowledge of the equipment used: both weapon and ammunition!
Using K-2
Without forcing, the gauge is presented at the muzzle of the weapon: it must not penetrate a length greater than 7.62 mm (i.e. one caliber, this length being indicated by a mark on the tool). The information, confirmed by the 3 repair manuals consulted, is quite surprising for us: on our side of the Iron Curtain, the control is generally done by the chamber, or even by both sides (especially for high precision weapons, with incremented gauges set in hundredths of millimeter to ensure an accurate follow-up of the barrel life … ), but rarely (in fact, never to our knowledge… but we are not omniscient!) only by the muzzle. Similarly, the design of the tool, of a considerable length and bearing a very clear control mark of 100 mm as already indicated, would have led us to believe that its use would be carried out by the chamber with a point of comparison on the frame or the barrel (the rear edge for example).
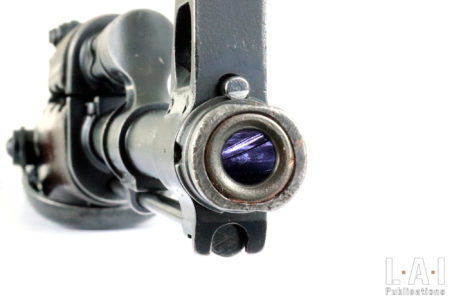
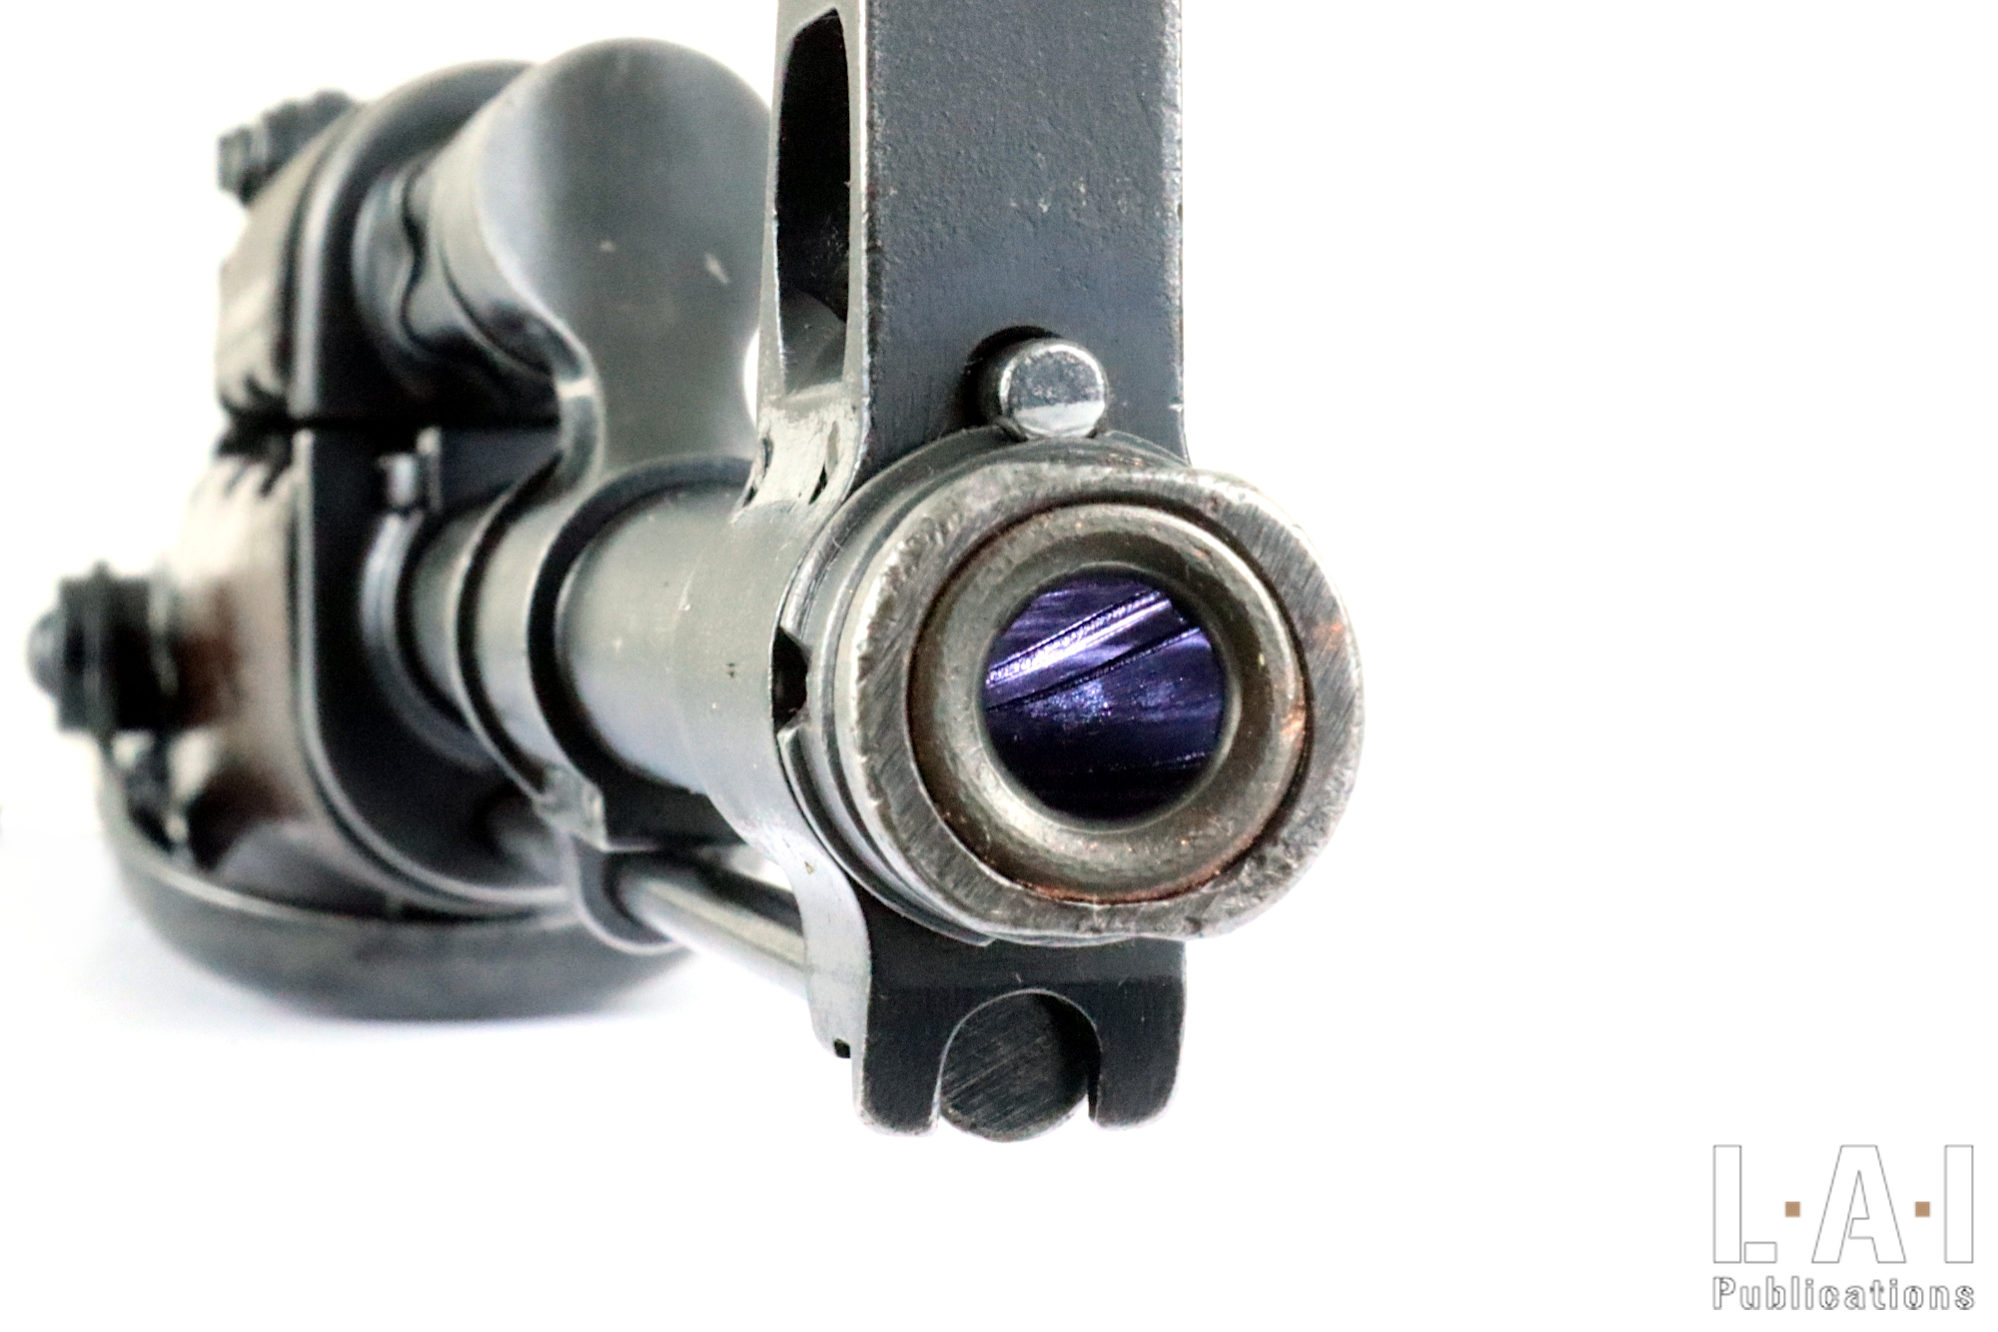
Another destabilizing fact: since we are in possession of this tool, we have controlled about thirty weapons of this caliber of different origin and in different condition: none has succumbed to the verification … and yet some are known to no longer meet the conditions of operational use because of the state of their barrel! We also note that the tool is in like-new condition… which tells us that unlike others, it does not seem to have known any significant use. This is not surprising: in fact, of the very many weapons we have controlled during our career, the use of this type of gauge has never made it possible to diagnose a weapon preventively but has only allowed us to validate a defect observed during shooting sessions. Finally, on weapons whose barrel bore is chrome-lined (a systematic thing on Soviet weapons after 1951 according to information collected from different sources), the visual control must indicate on its own, a degradation requiring a repair of the weapon … or its decommission (Pic.12). On this type of weapon of war, the replacement of the barrel is not provided for in a service way… when the barrel is out of order, then weapon is decommissioned. As a reminder, a decommissioned weapon is scrapped or at least excluded from operational use.
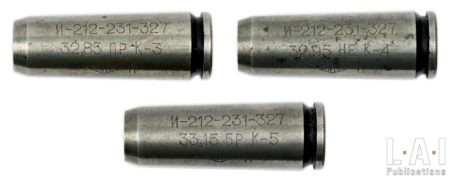
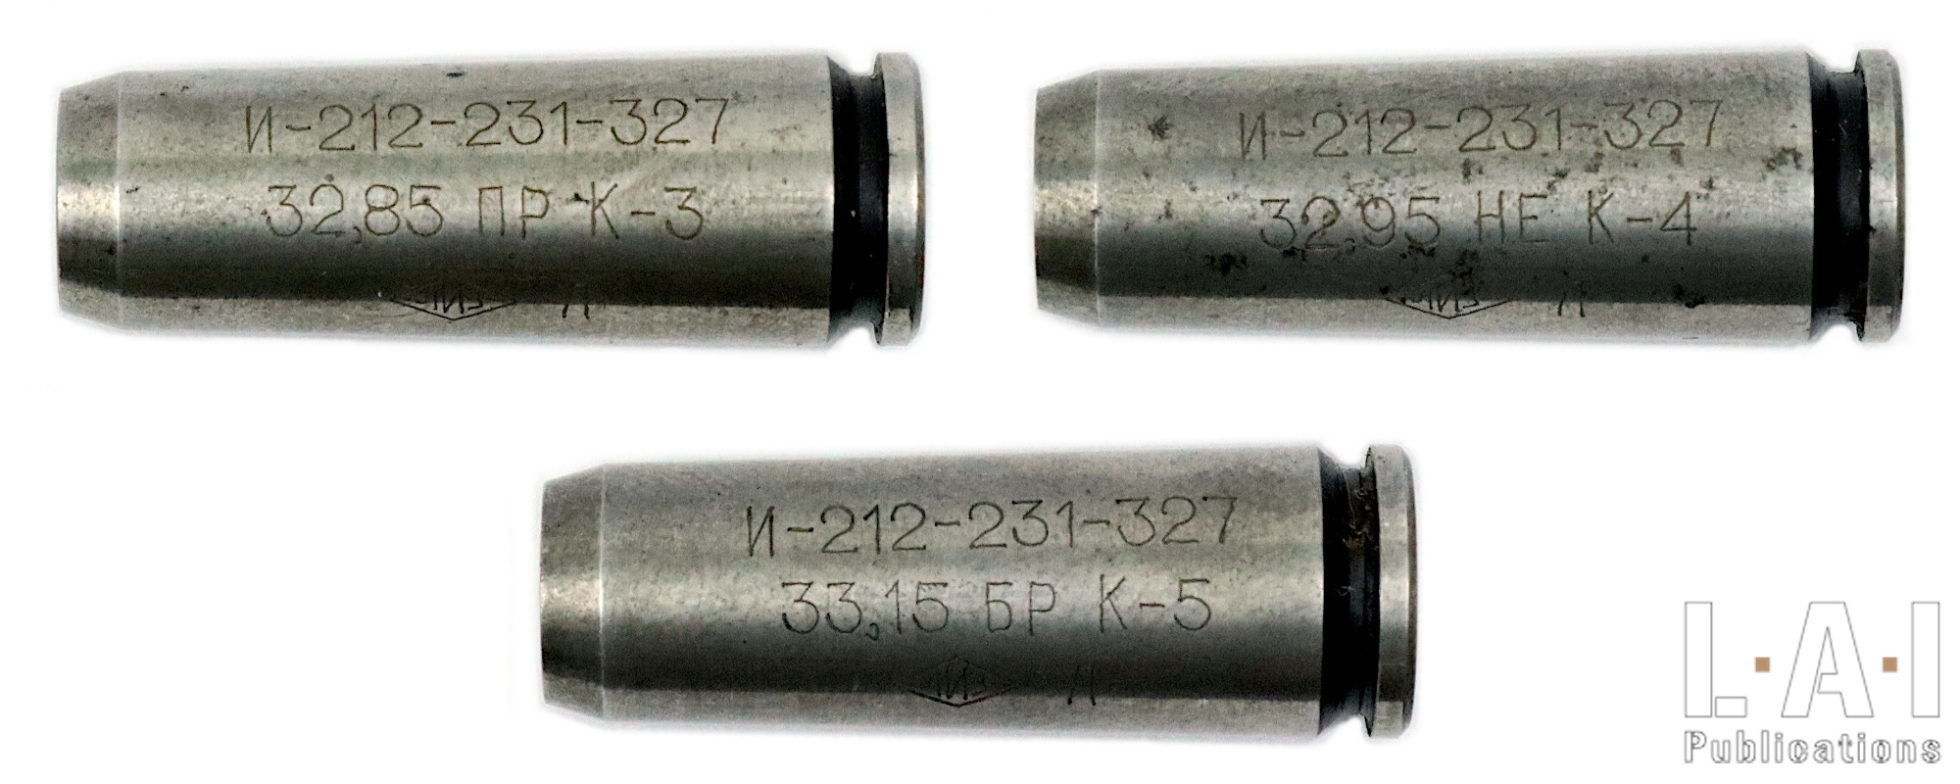
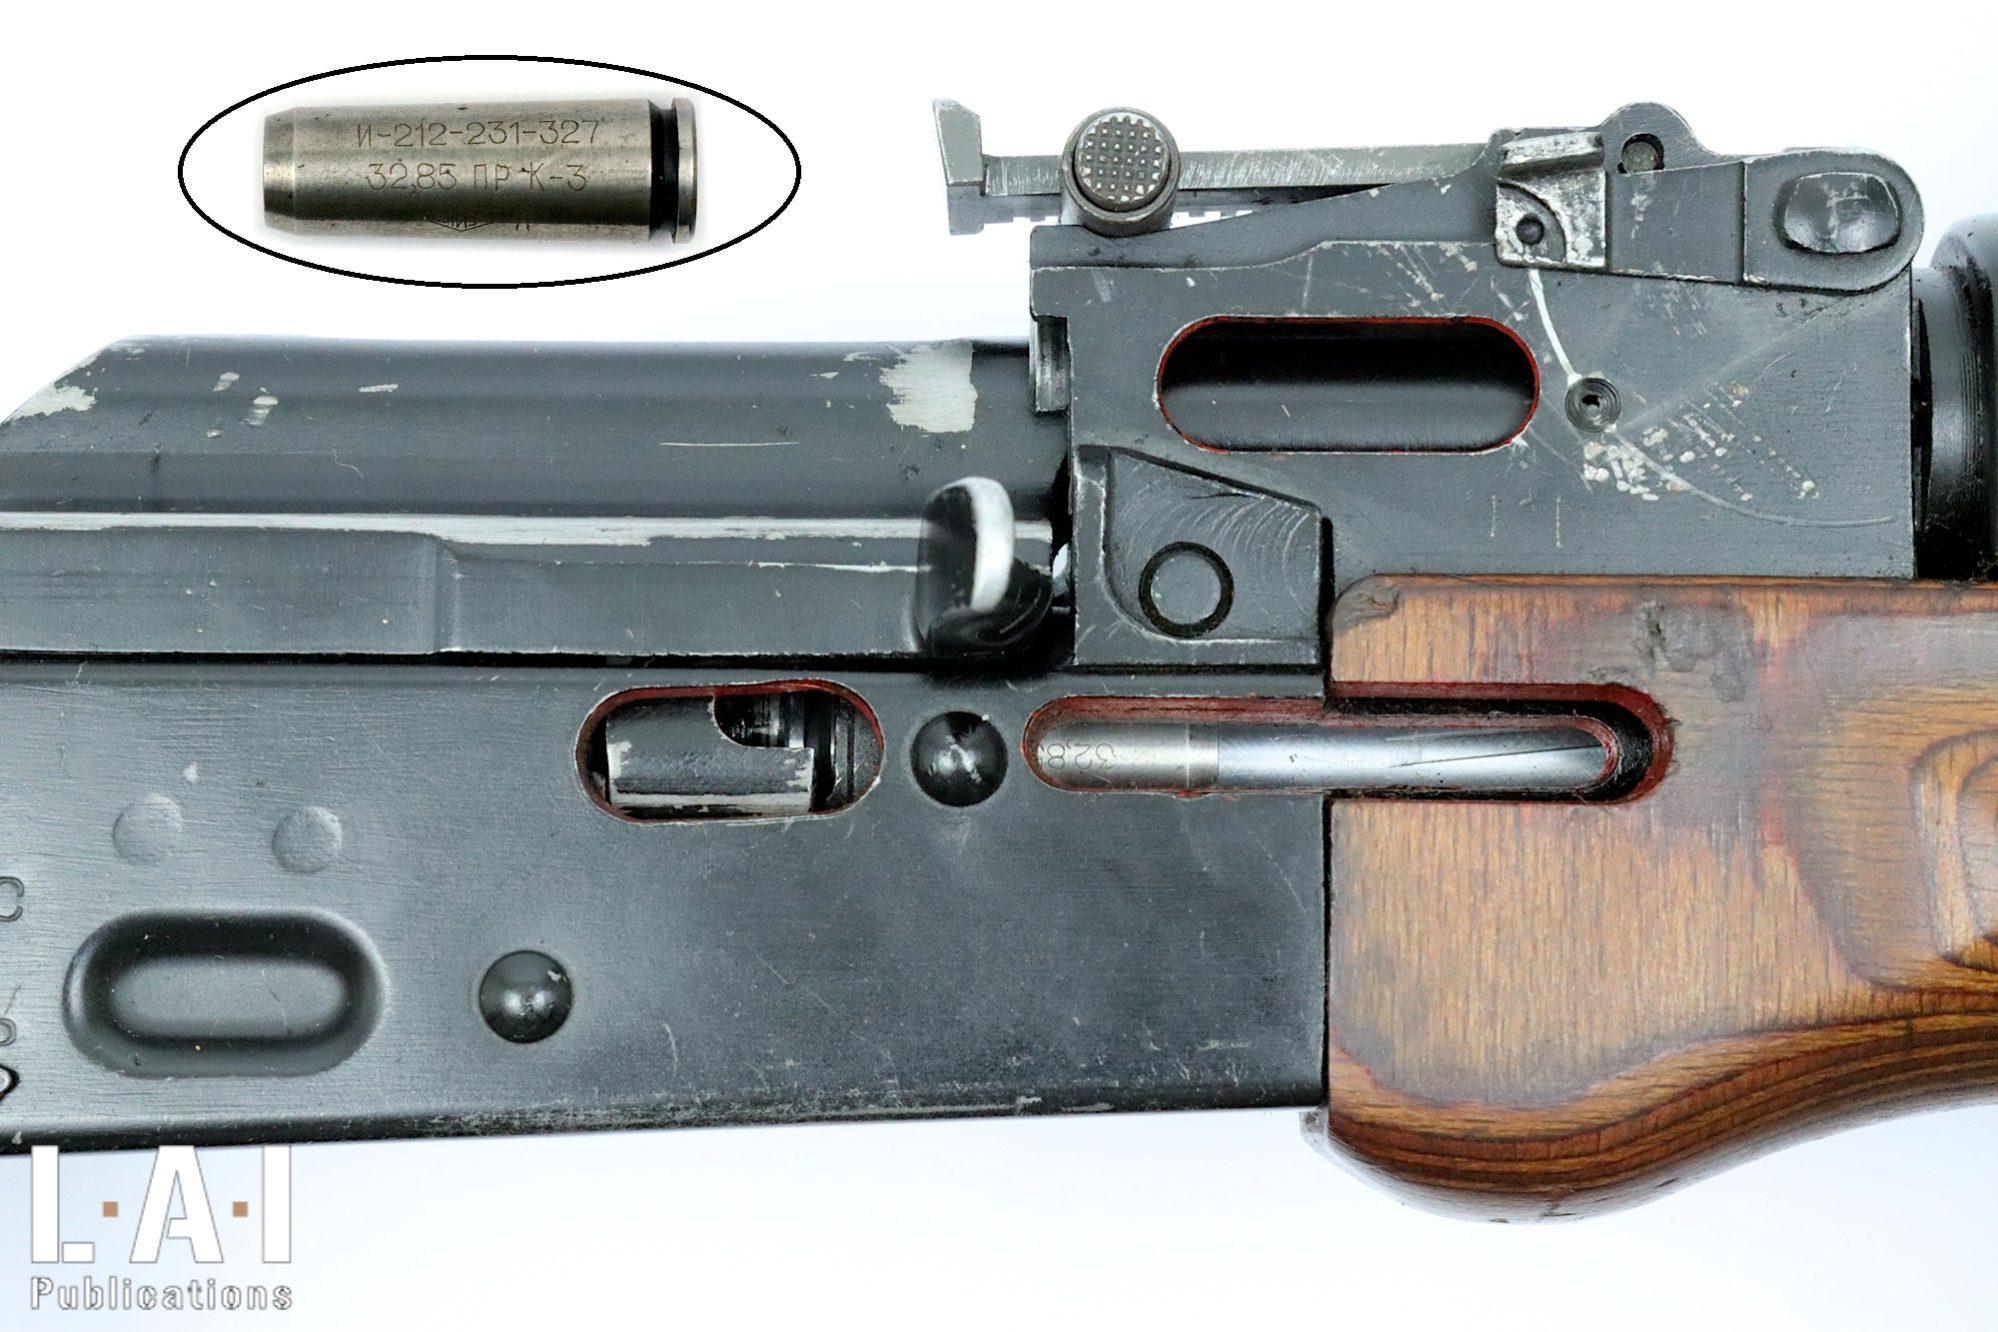
K-3: “GO” headspaceDistance between the rear support surface of the ammunition ... More gauge (Pic.13)
It allows the verification of the minimum headspaceDistance between the rear support surface of the ammunition ... More and thus determines that the barrel / bolt / frame assembly is able to accommodate the ammunition to the maximum dimensions when the bolt is locked. This gauge has a headspaceDistance between the rear support surface of the ammunition ... More value of 32.85 mm. It should be noted that this verification is done in the Soviet standard: yes, we are neither here in the civilian world of the CIP nor the SAAMI!
It can be noted that it is rare to inspect weapons in service that do not pass this test: this verification is normally done at the factory before delivery or at the end of repair and there is little reason to see the headspaceDistance between the rear support surface of the ammunition ... More of a weapon changing… by tightening! Indeed, the opposite is normally the case. Of course, nothing prevents you from checking the GO as part of an inspection… because we cannot exclude the “weapon salad”, a practice that consists in reassembling a weapon with parts that are not originally its own… and that can lead to surprising situations!
Use of the K-3 gauge (Pic.14)
Having previously removed the firing-pin and the extractor from the bolt and without putting the recoil spring assembly back into position, the gauge is inserted into the barrel chamber and the bolt carrier assembly is moved back to the closing position: the bolt must lock without forcing.
Why not use the gauge with the extractor? Gauges are precision tools: as long as possible, it is advisable to avoid any type of degradation and shock in use. However, the passage of the extractor, the shock against the ejector and possibly, the impact of the tool on the ground, are not really indicated or useful for an operation whose purpose is “check a dimension”!
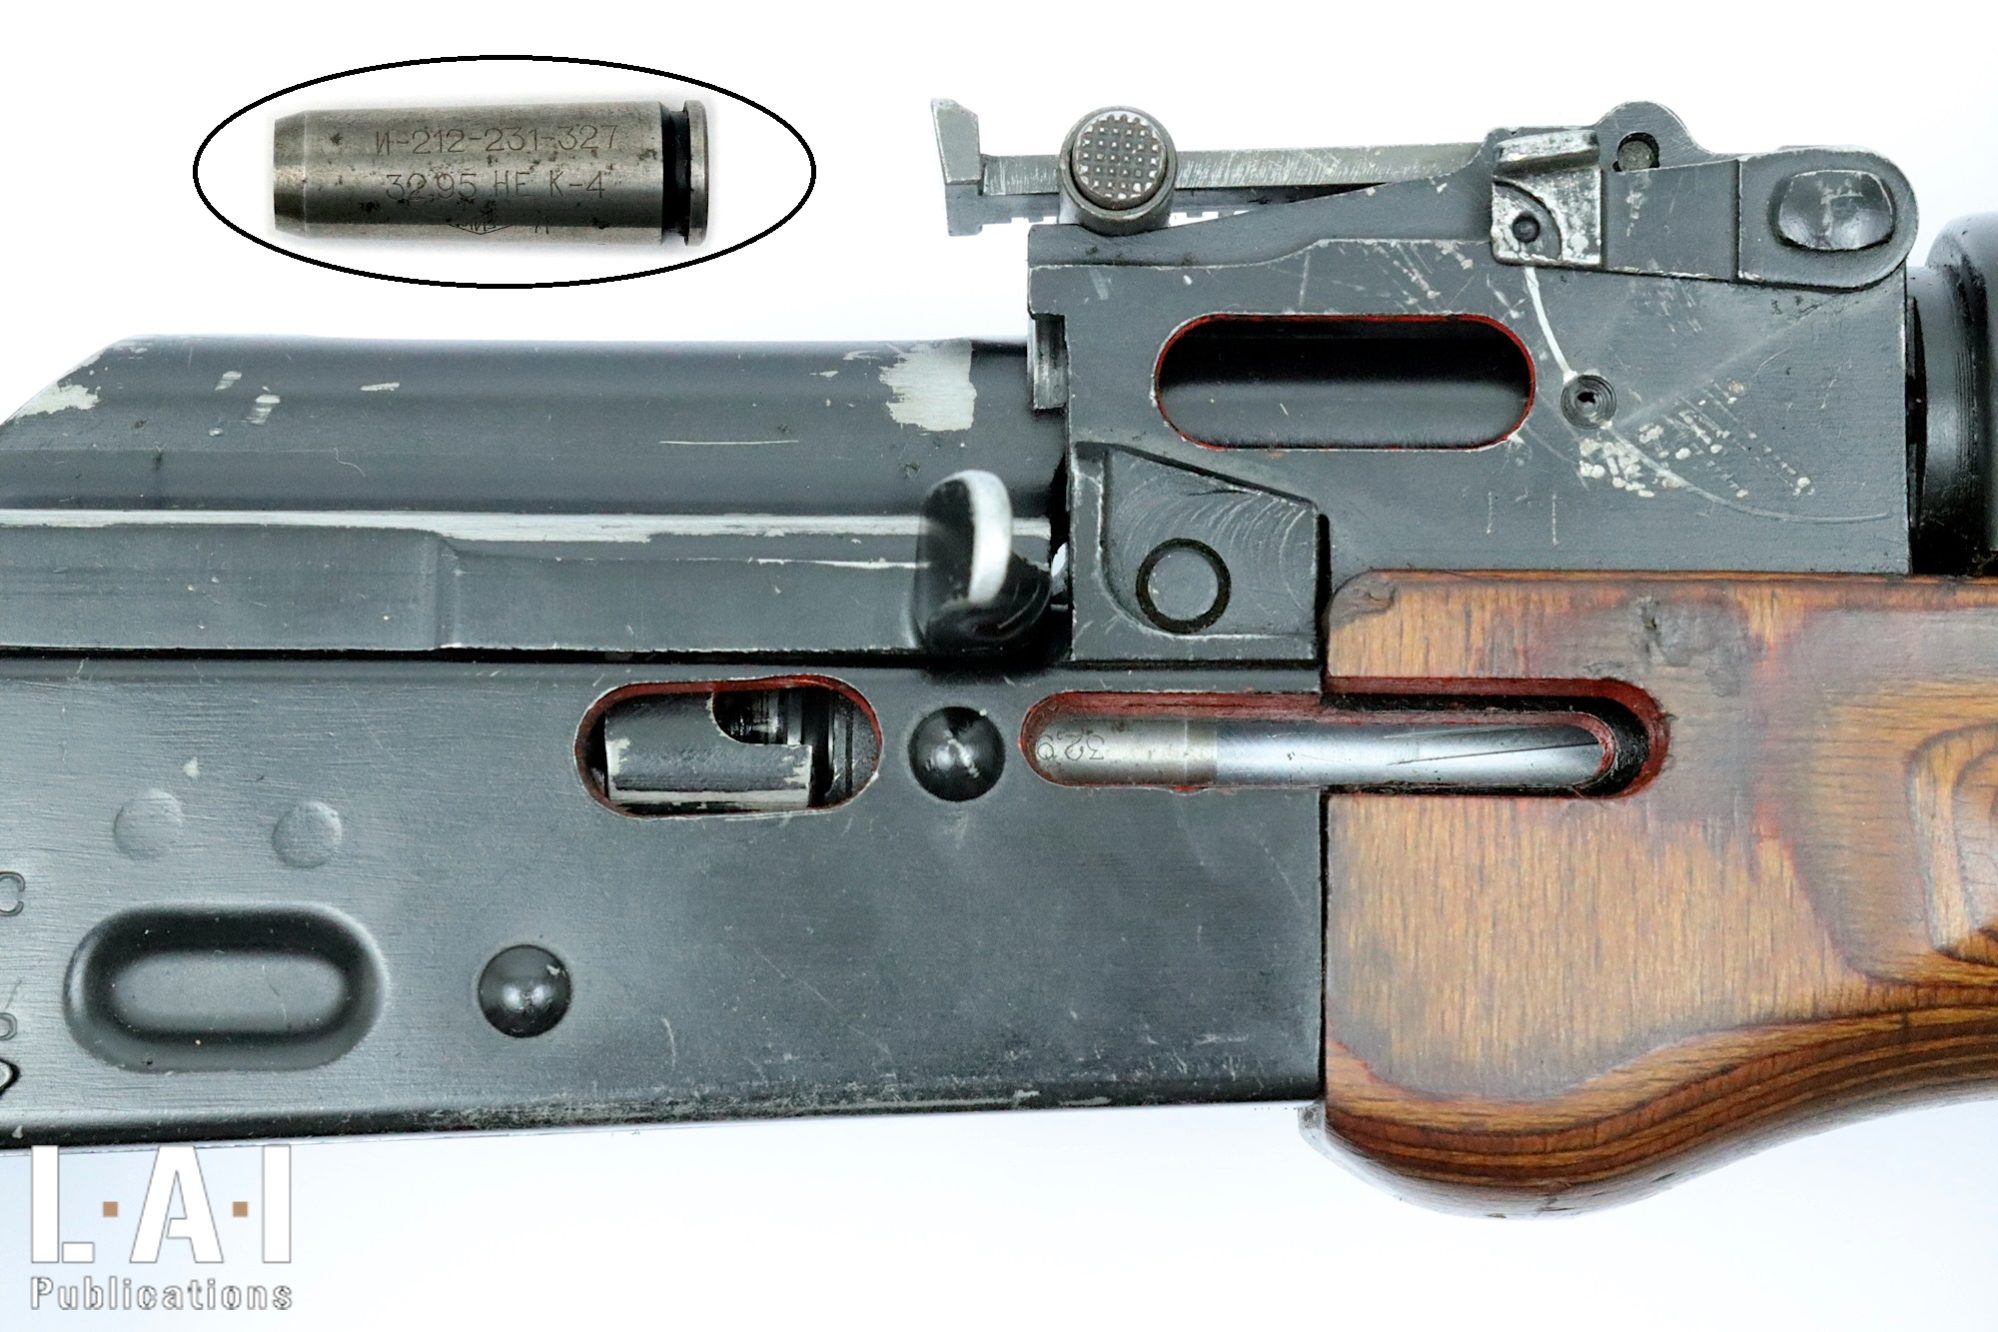
K-4: headspaceDistance between the rear support surface of the ammunition ... More “NO-GO” gauge (Pic.13)
It allows to check that the headspaceDistance between the rear support surface of the ammunition ... More is not excessive… in a new weapon or when replacing the bolt! Indeed, this type of gauge is normally used in manufacturing or repair to control that the weapon is not put or put back into service with a headspaceDistance between the rear support surface of the ammunition ... More too close to excess, but without being “non-compliant”. Actually, it is a gauge intended to verify that there is indeed a “margin”, not of safety, but of aging. This gauge has a headspaceDistance between the rear support surface of the ammunition ... More value of 32.95 mm… only 0.10 mm more than the “GO” gauge. It should be noted that the repair manual for RPD-44, SKS-45 and AK-47 also mentions the existence (and use) of a “К-4 Р” gauge (K-4R) whose value is 33.05 mm… another 0.10 mm more. It is this gauge that is normally used for the replacement of the bolt during a repair.
The existence of this “К-4 Р” gauge seems to us to be an additional invitation to show pragmatism: for the evolution of 0.10 mm of headspaceDistance between the rear support surface of the ammunition ... More, how many shots are fired and how many years of service? For 0.10 mm less headspaceDistance between the rear support surface of the ammunition ... More, how much unnecessary repair? How much unnecessary “immobilization”? Once again, the life expectancy of the weapon, in “normal” use, must formally remain the focus of an inspection… “over-quality”, in this mission, is a waste sometimes very expensive for the taxpayer …
Use of the K-4 gauge (Pic.15)
Having previously removed the firing-pin and the extractor from the bolt and without putting the recoil spring assembly back into position, the gauge is inserted into the barrel chamber and the bolt carrier group is moved back to the closing position: the bolt must not lock on a new or newly repaired weapon. On a weapon in service, if the bolt locks, it is tested with the K-5 gauge. It can be noted that the repair manual of the AK-47 specifies that on a weapon under repair, the locking must not intervene with an effort of 20 kg at the closing! A rather precise protocol for a weapon with the reputation (completely unfounded) of being “primitive”. In fact, the people who state this stupidity (yes, it is one…) confuses “primitive” and “rustic”.
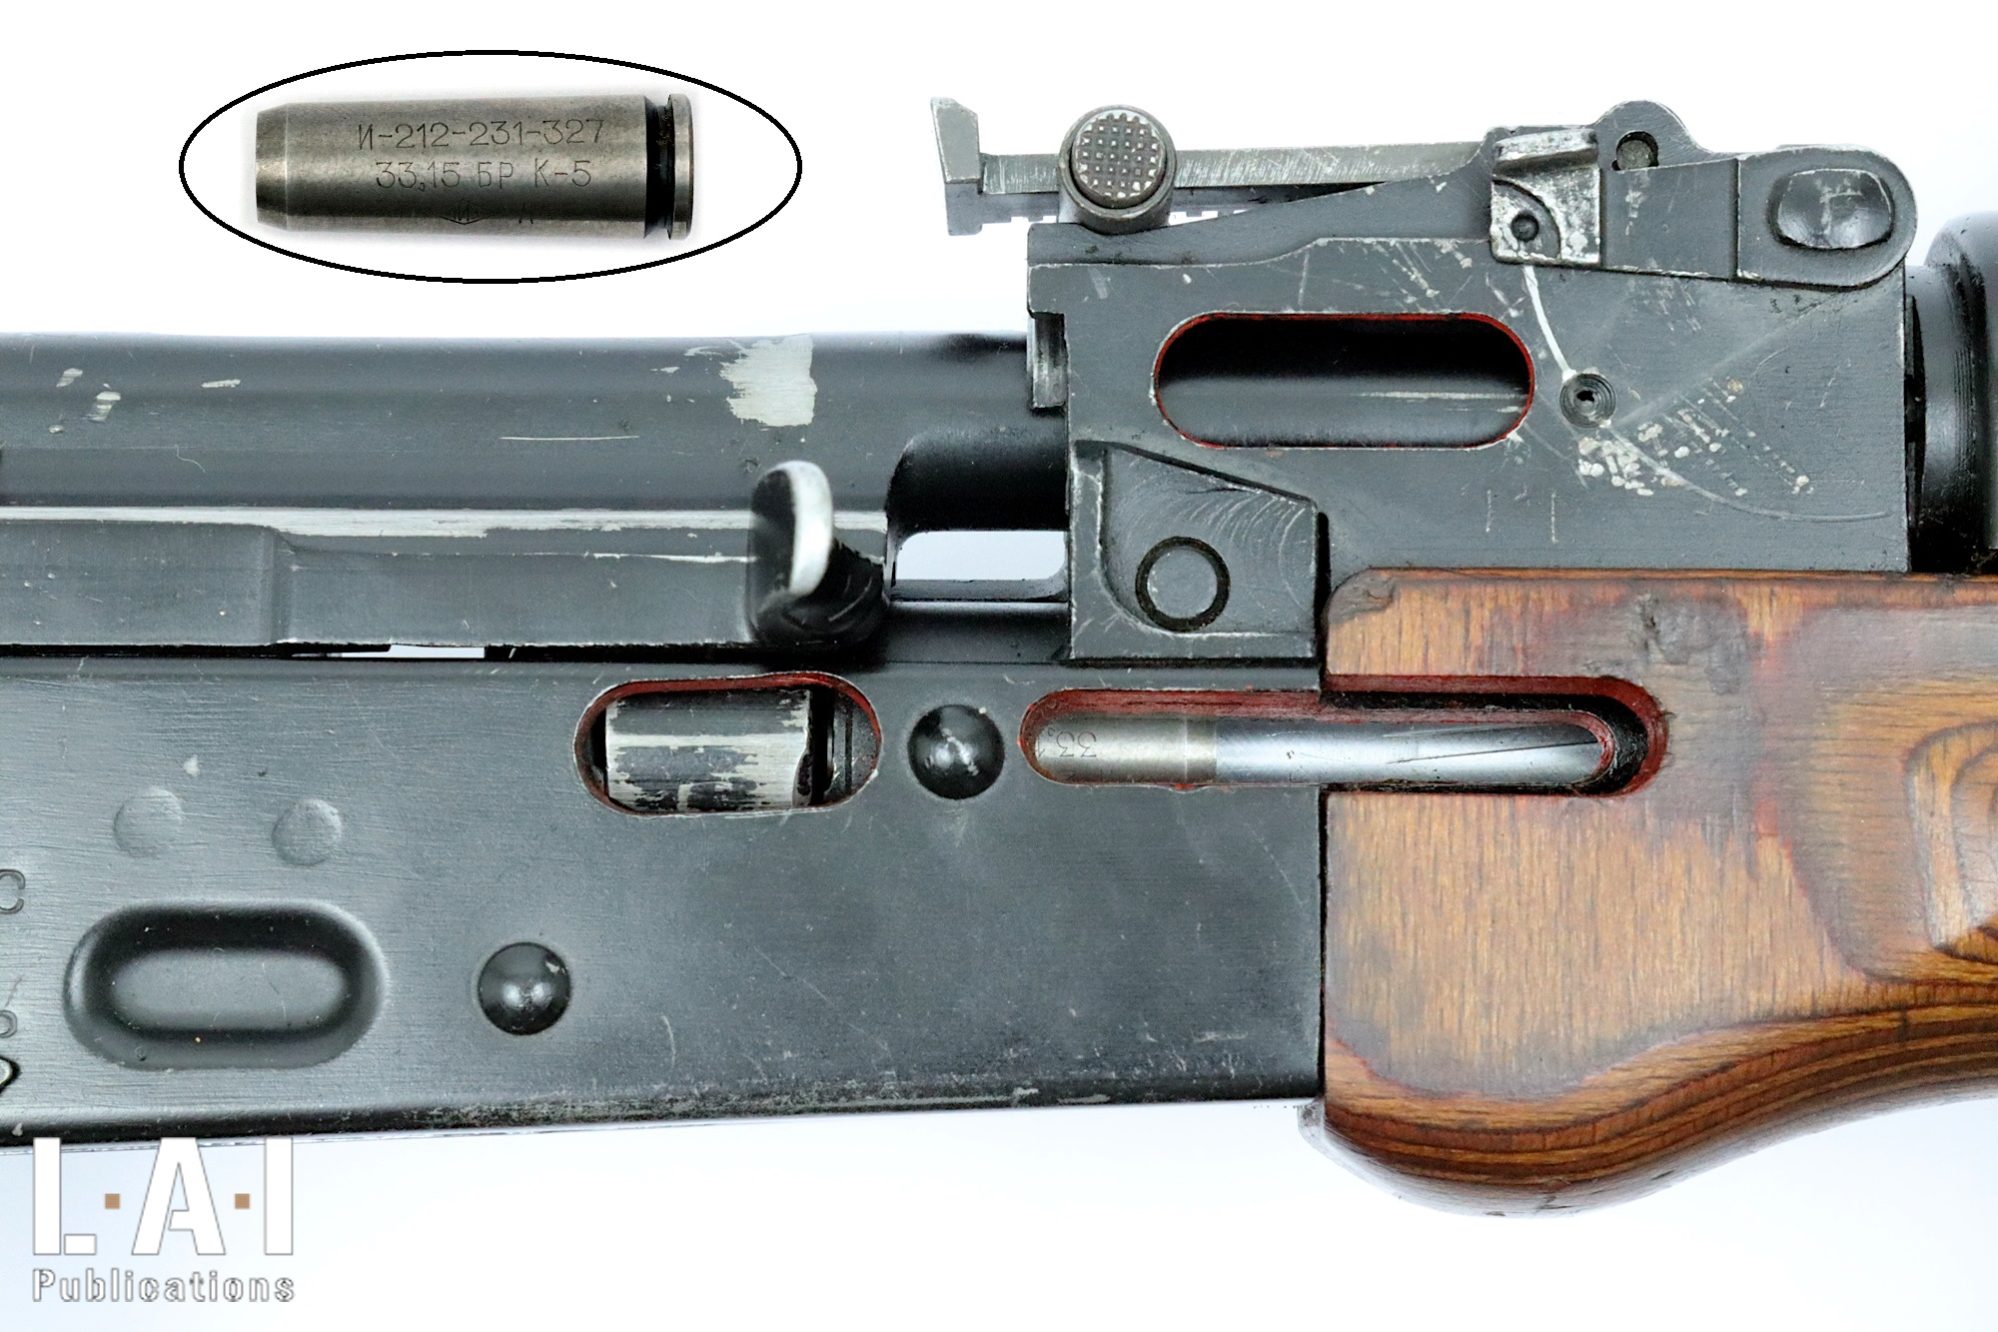
K-5: “Rejection” headspaceDistance between the rear support surface of the ammunition ... More gauge (Pic.13)
It makes it possible to check that there is no excess of headspaceDistance between the rear support surface of the ammunition ... More. An excess of headspaceDistance between the rear support surface of the ammunition ... More leads to shooting incidents, or even to accidents (case shear-off …). This is THE useful headspaceDistance between the rear support surface of the ammunition ... More gauge for the control of a service weapon. This gauge gives a headspaceDistance between the rear support surface of the ammunition ... More value of 33.15 mm, which is 0.20 more than the NO-GO K-4 gauge (0.10 more than the К-4Р) and 0.30 more than the GO K-3 gauge. This control is of course checked 0.30 mm in total… or the thickness of an 80g sheet of paper folded into 3…
Use of the K-5 gauge (Pic.16)
Having previously removed the firing-pin and the extractor from the bolt and without putting the recoil spring assembly back in position, the gauge is inserted into the barrel chamber and the bolt carrier assembly is moved back to the closing position: the bolt must not lock. If the bolt locks: the weapon is to be considered as “prohibited from firing“, because it presents a danger to use. It needs to be repaired… or decommissioned!
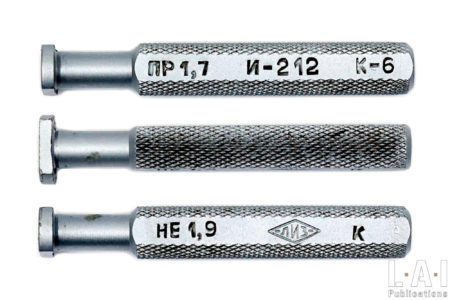
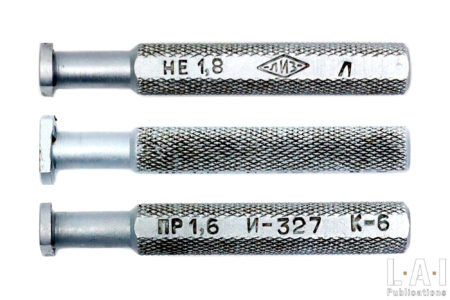
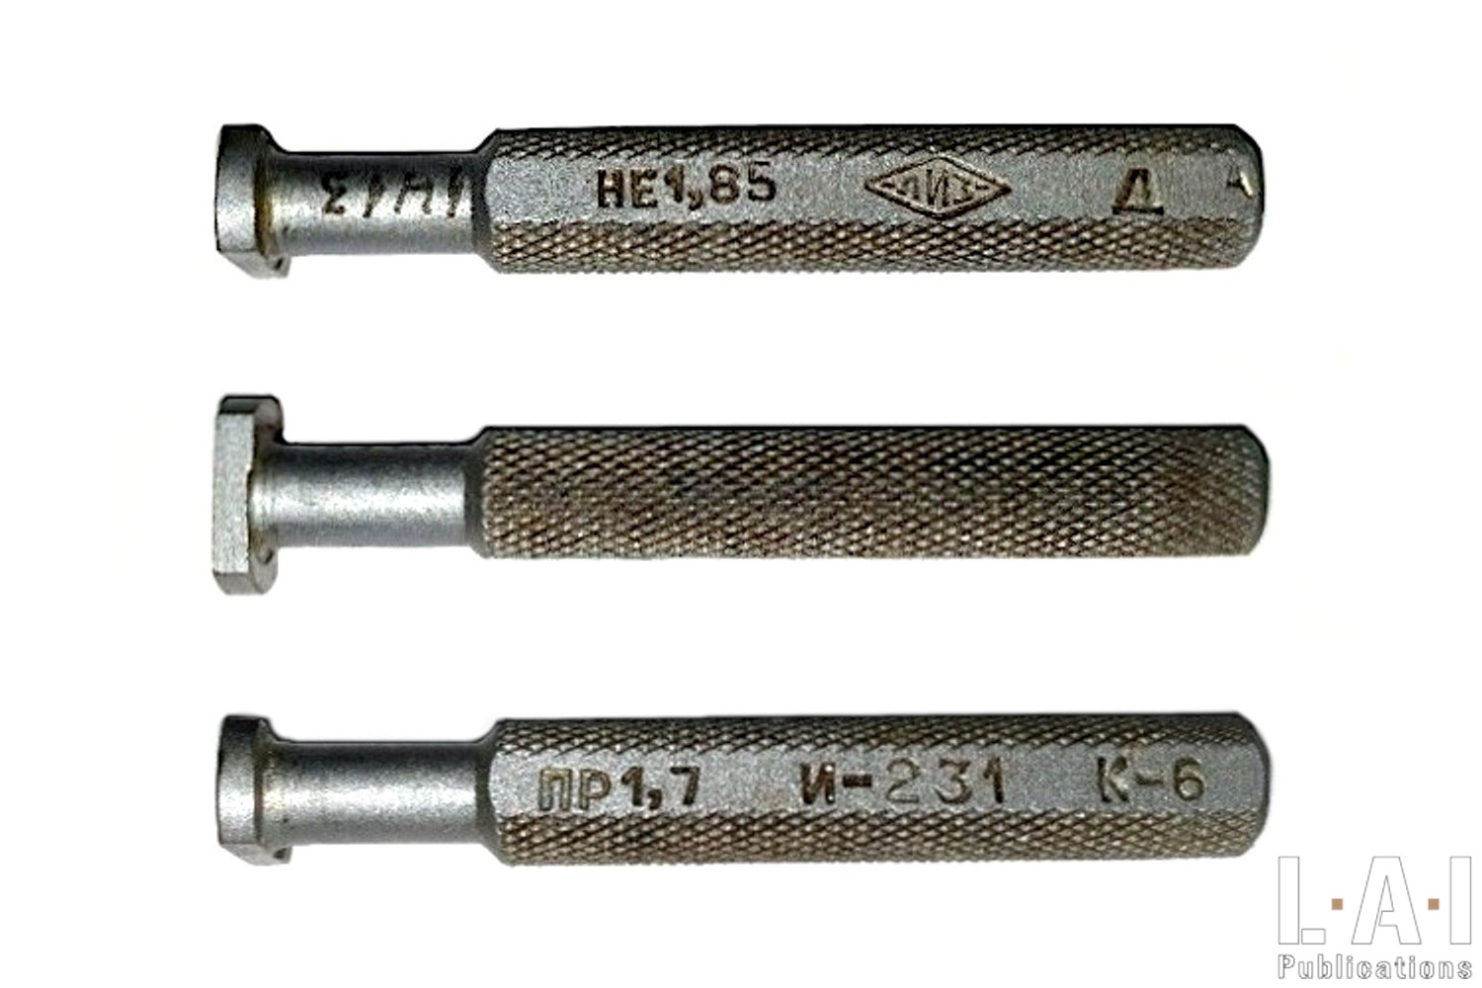
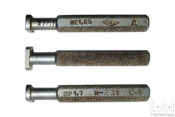
K-6: extractor space gauge (Pics.17 to 19)
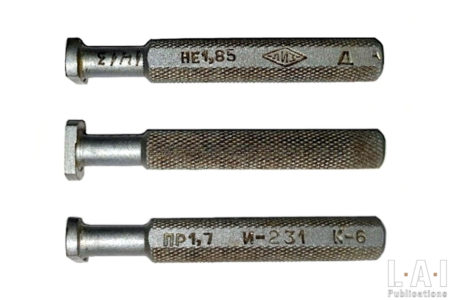
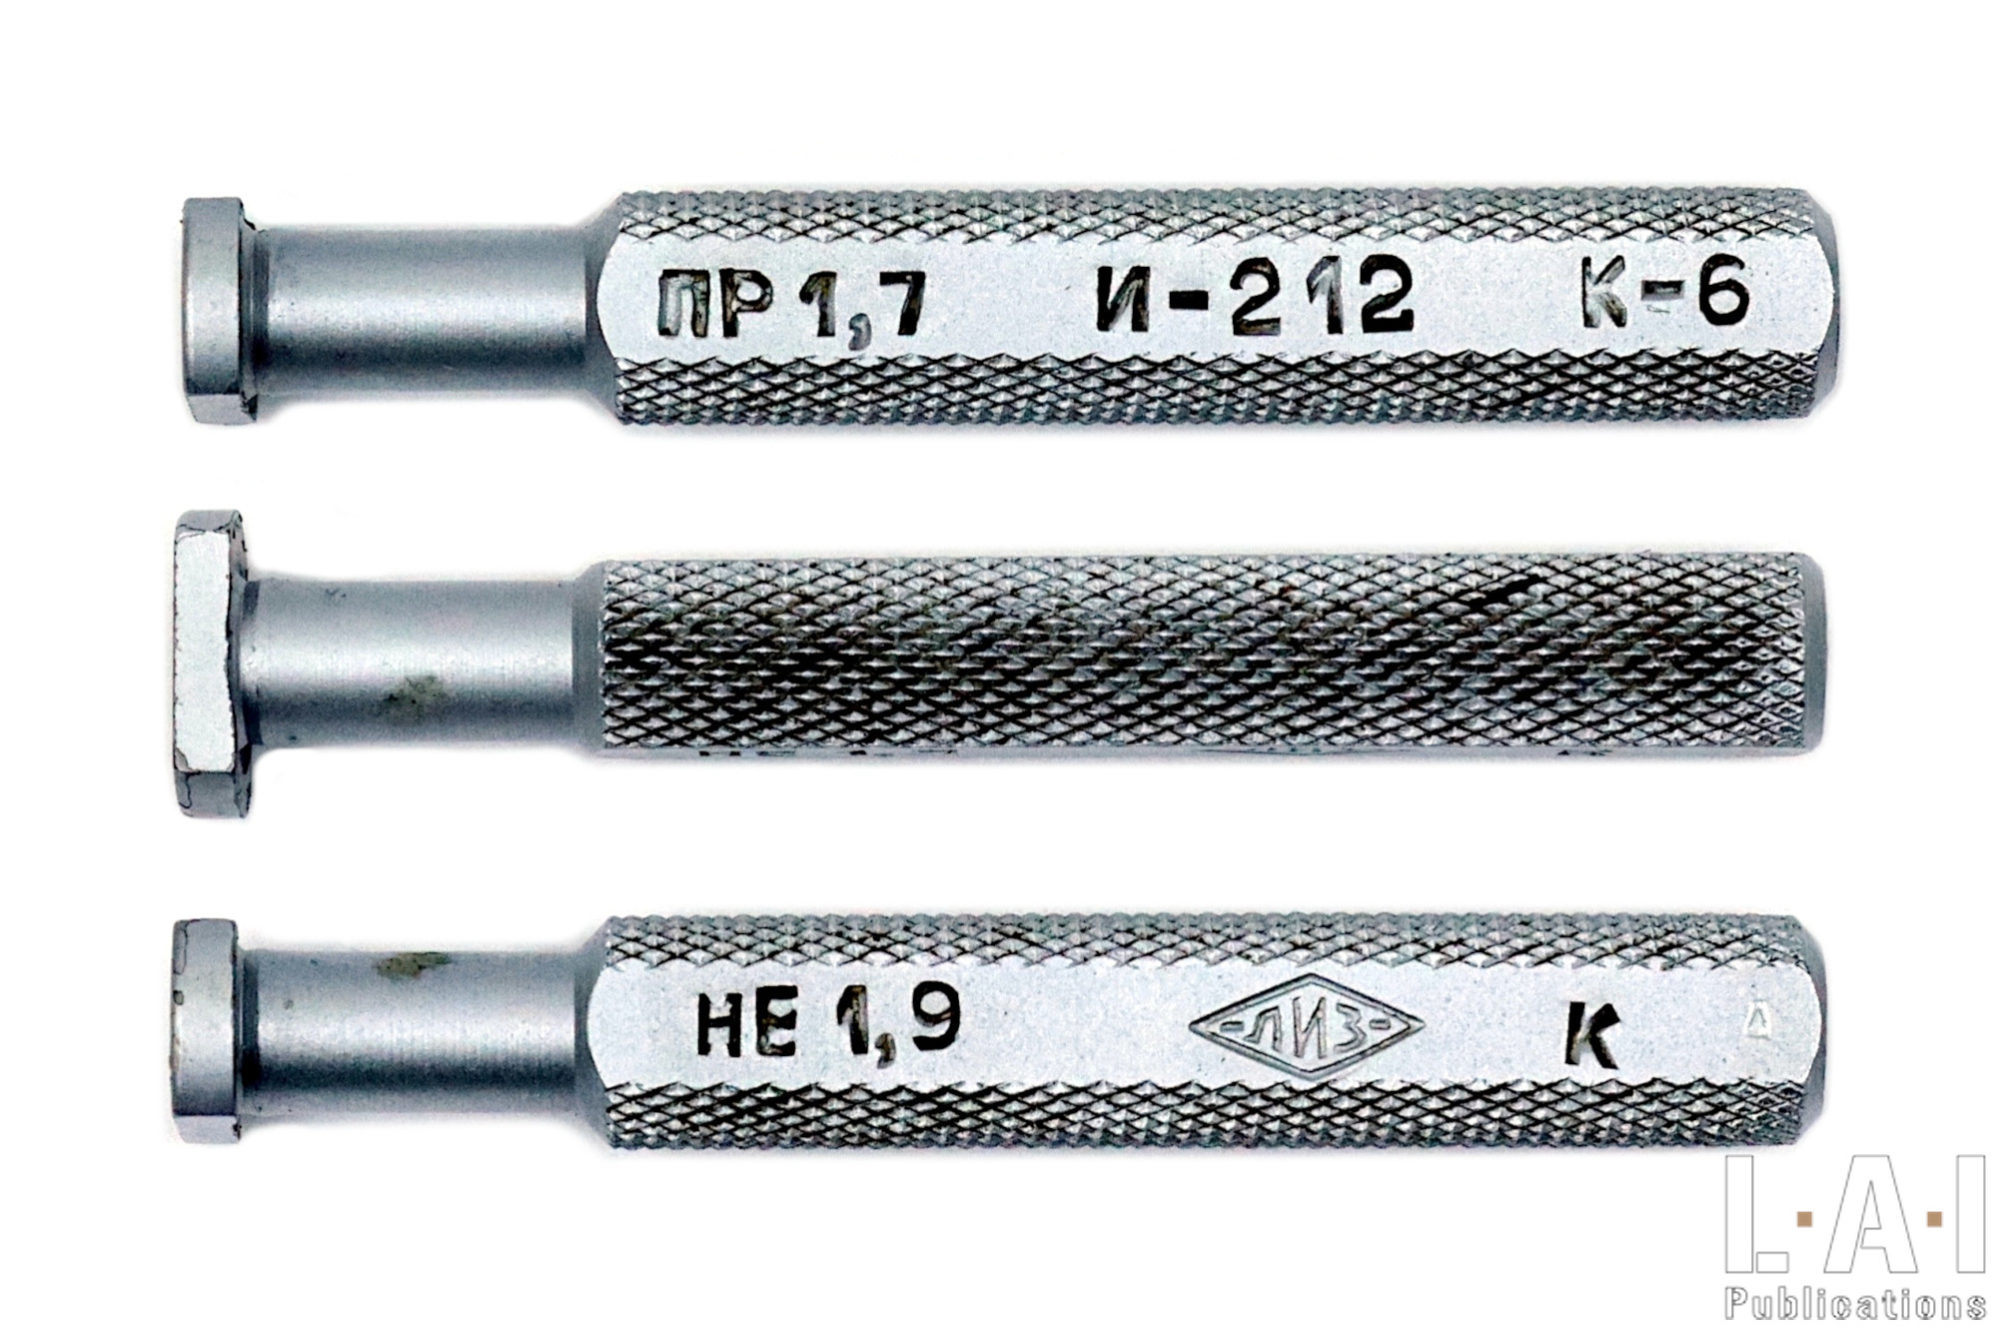
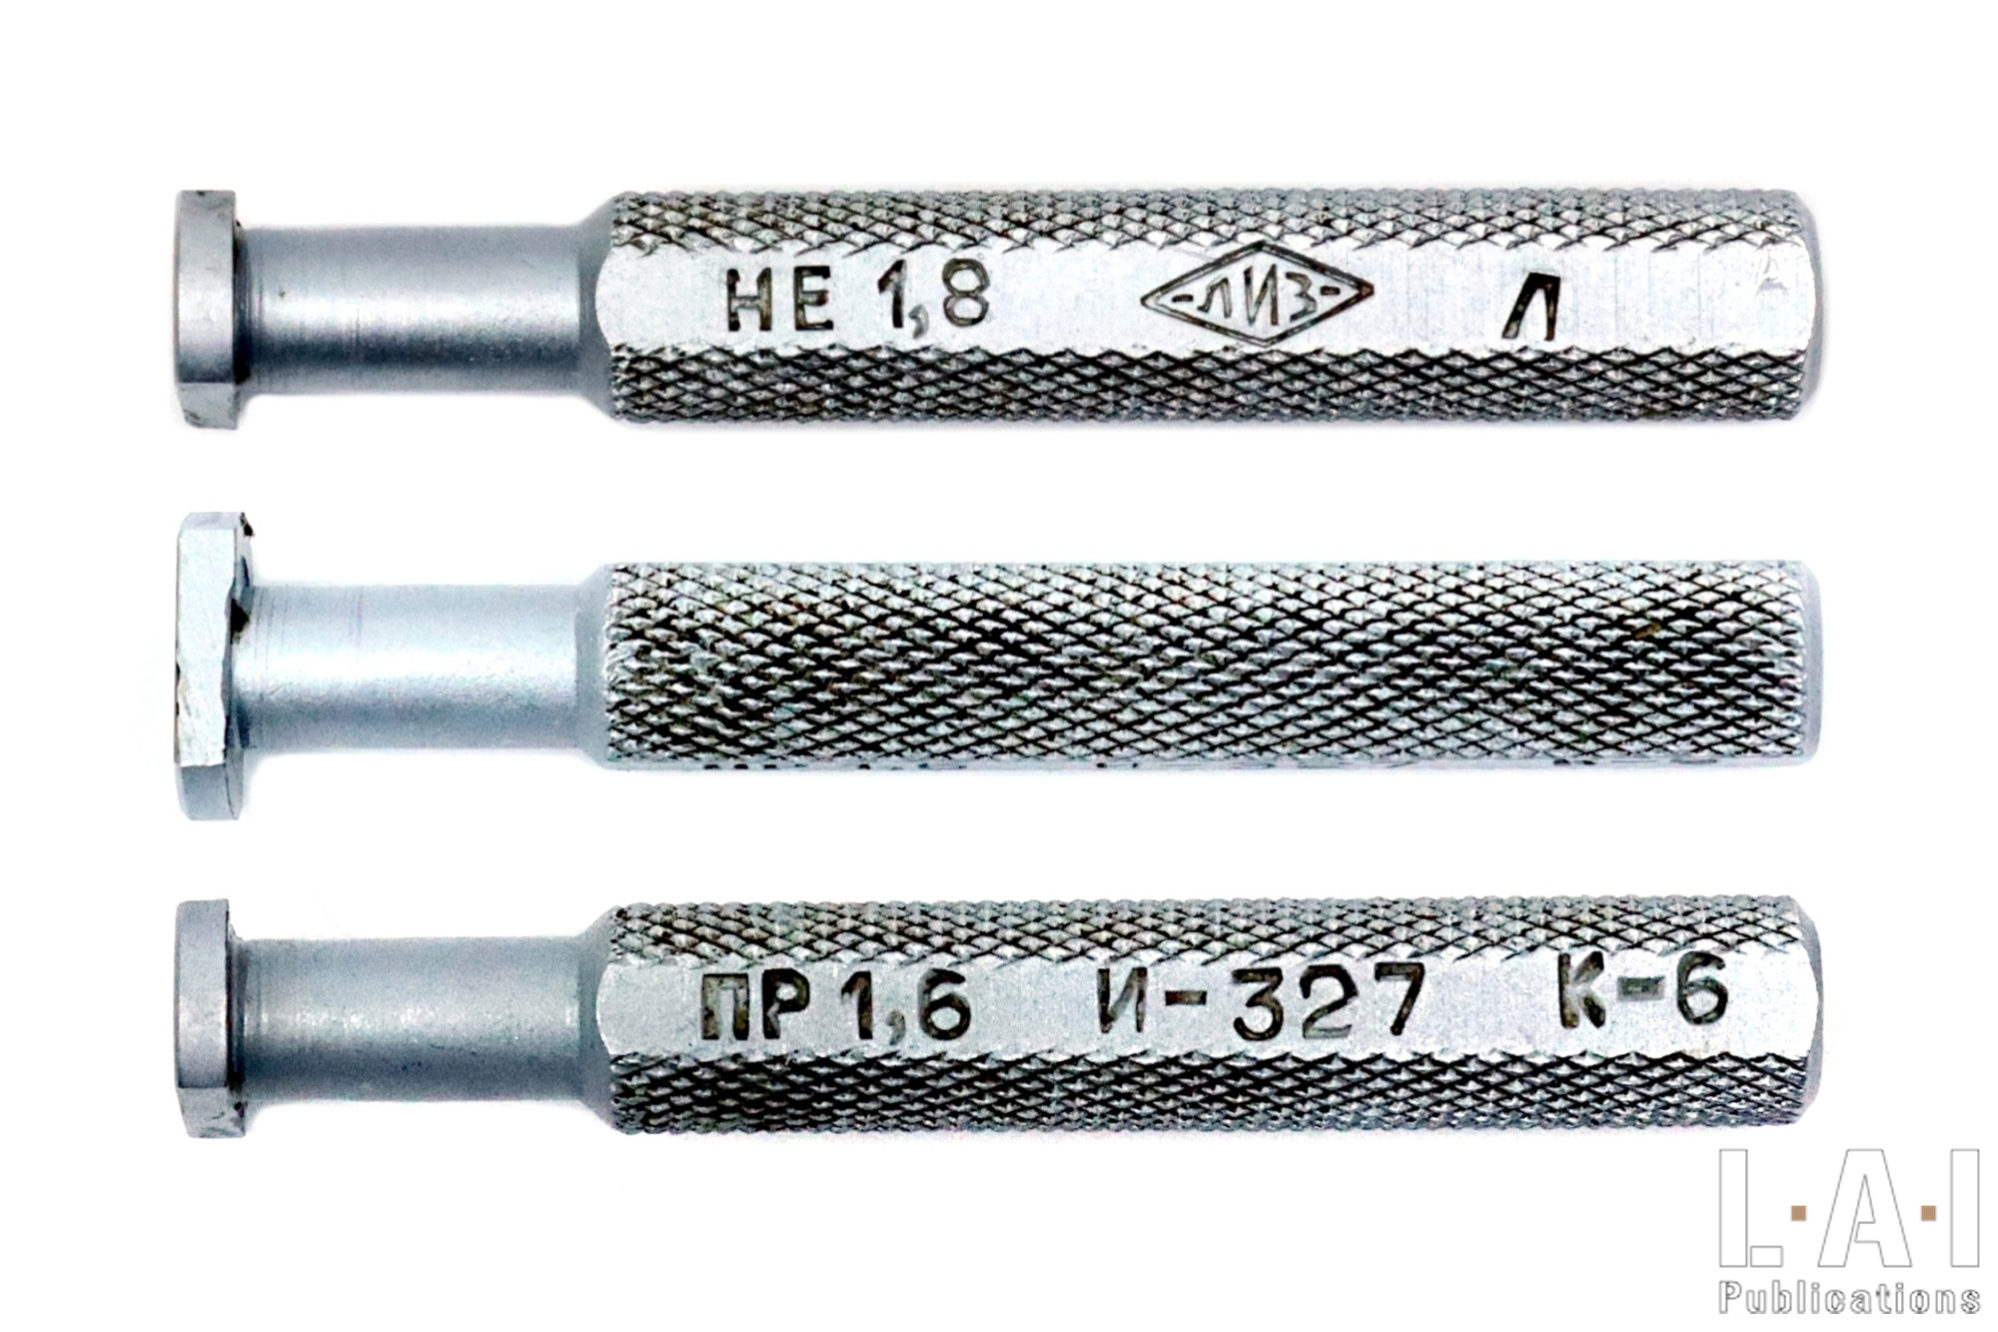
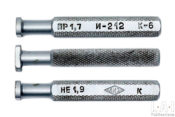
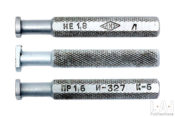
These gauges make it possible to control the distance between the bolt faceThe bolt face is the part of the bolt which in set place the... More and the anterior surface of the extractor claw. Remember here that the extractor obviously has the function of removing the spent case from the chamber … but also the function of guiding it during the ejection phase. The extractor is a mechanical element particularly stressed on an automatic weapon. The 56-И-01 set has three tools:
- One for the 56-И-327 (RPD-44) with the control value: GO = 1.6 mm and NO-GO = 1.8 mm.
- One for the 56-И-231 (SKS-45) with the control value: GO = 1.7 mm and NO-GO = 1.85 mm.
- One for the 56-И-212 (AK-47) with the control value: GO = 1.7 mm and NO-GO = 1.9 mm.
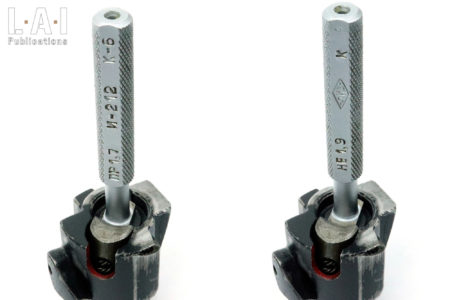
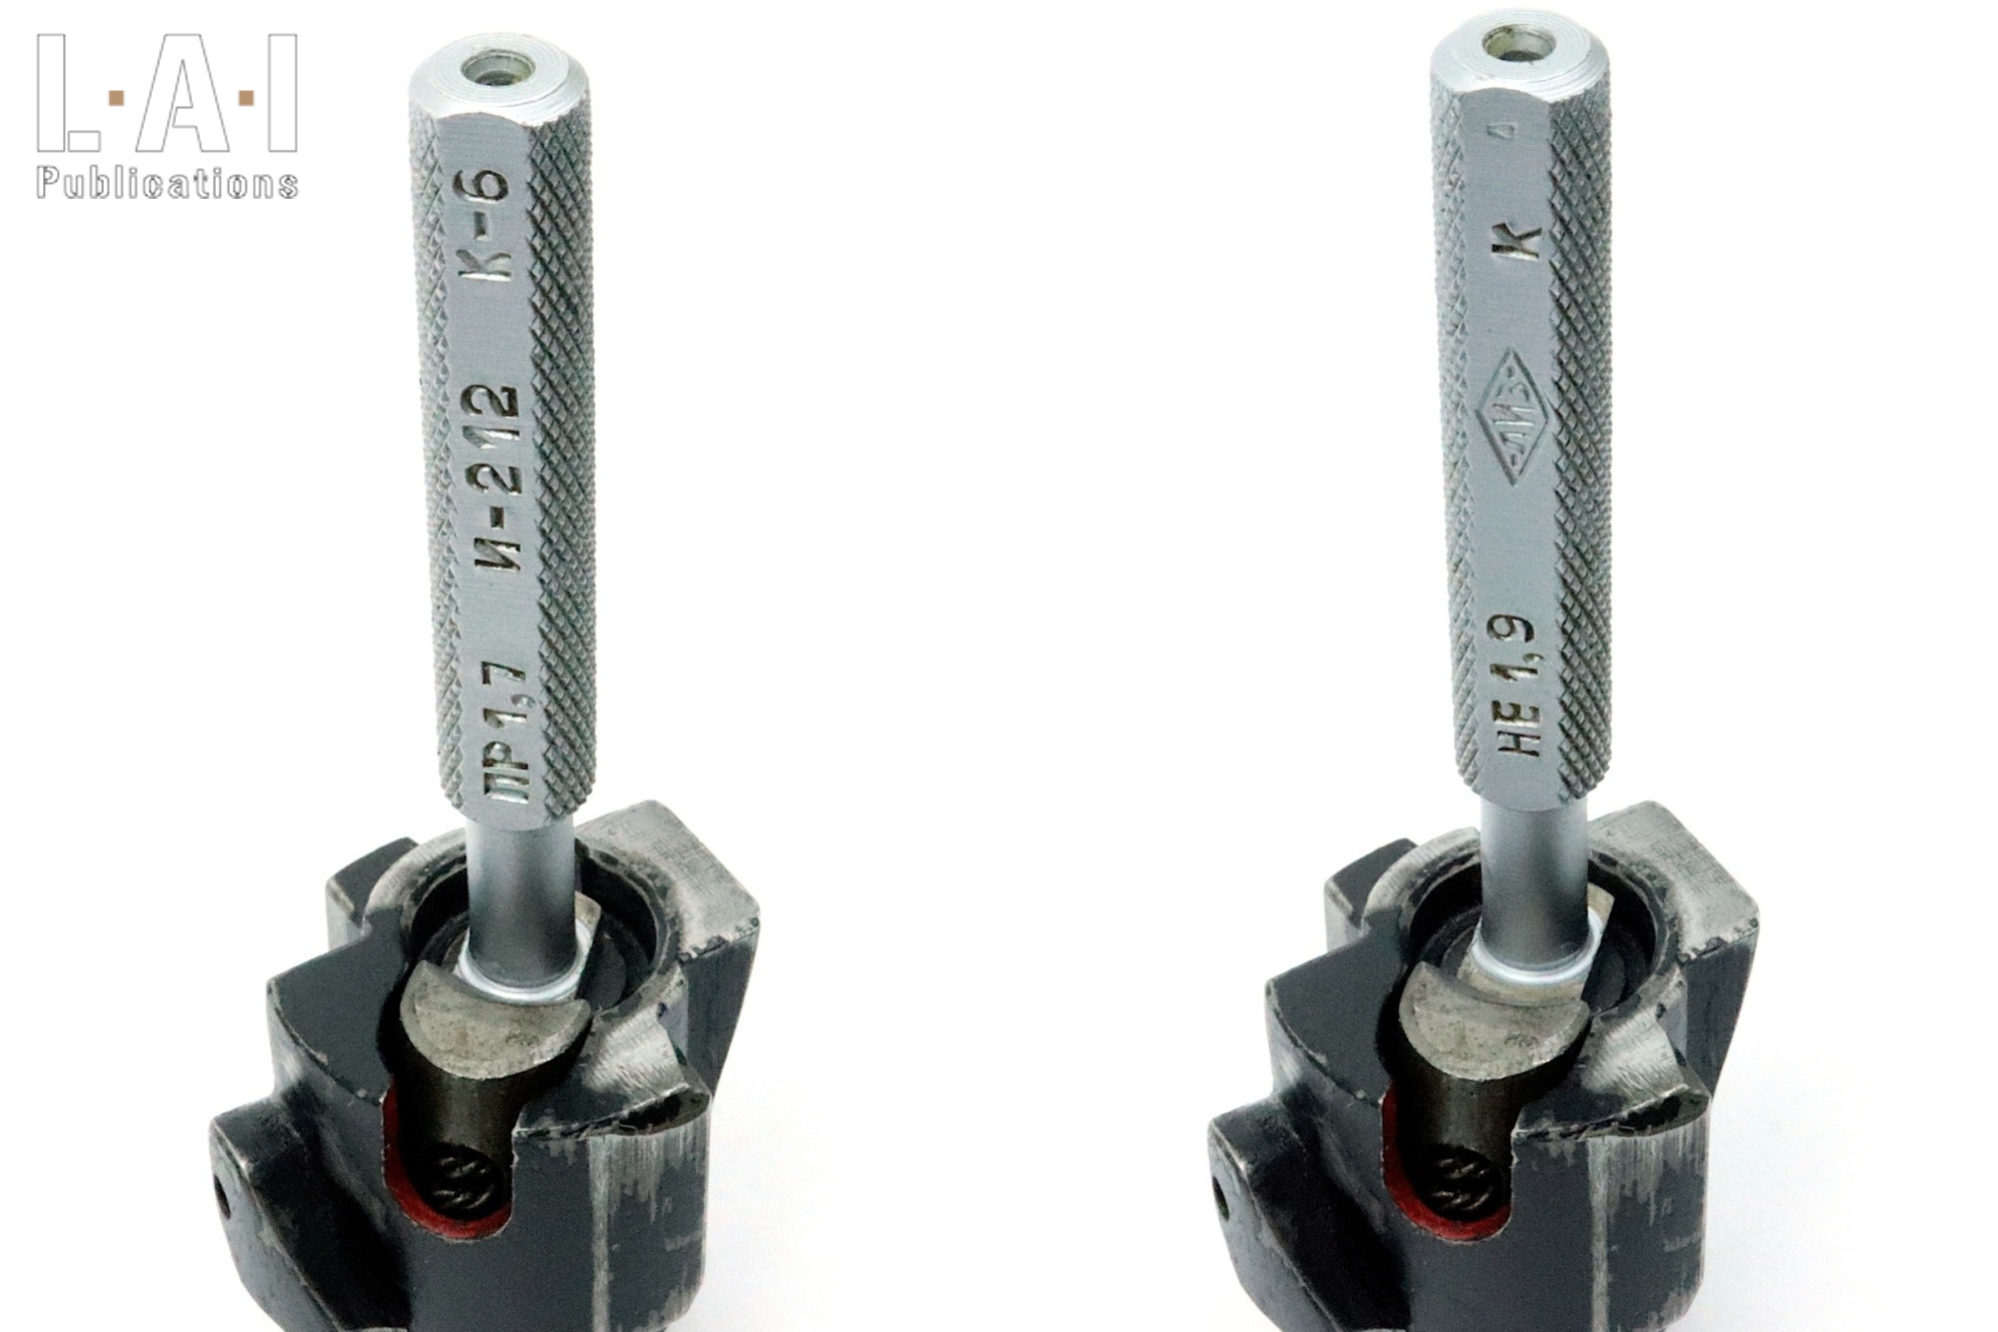
Use of the K-6 gauge (Pic.20)
On the bolt with its assembled extractor, without forcing (the extractor assembled in the bolt has a high elasticity, so it is advisable not to “distort the control”), position the gauge by keeping the front end of the tool in contact with the bolt faceThe bolt face is the part of the bolt which in set place the... More, then present the tool in contact with the claw of the extractor.
- The “GO” side must pass under the claw.
- The “NO-GO” side should not pass under the claw.
It should be noted that in some versions of the repair manuals (in fact, the three made available at the end of this article, but at least one other repair manual for SKS does not mention this practice), the use of this gauge is in fact associated with a feeler gauge:
- 0.20 mm thick for the AK-47.
- 0.25 mm thick for the SKS-45.
- 0.30 mm thick for rpd-44.
In all three cases, the dimension thus obtained is 2.10 mm thick. The reasons for this protocol variation are not formally known to us. However, it is probably the result of the desire to avoid unnecessary repairs: it is thus constituted a “REJECT” gauge at 2.10 mm by the modified use of the “NO-GO” gauge of each weapon. The control dimension is “pushed back”.
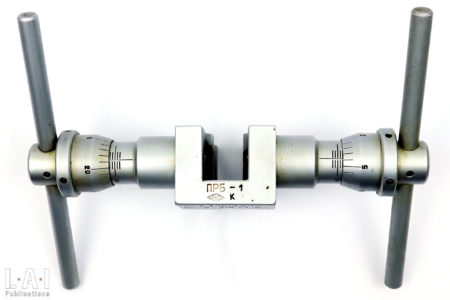
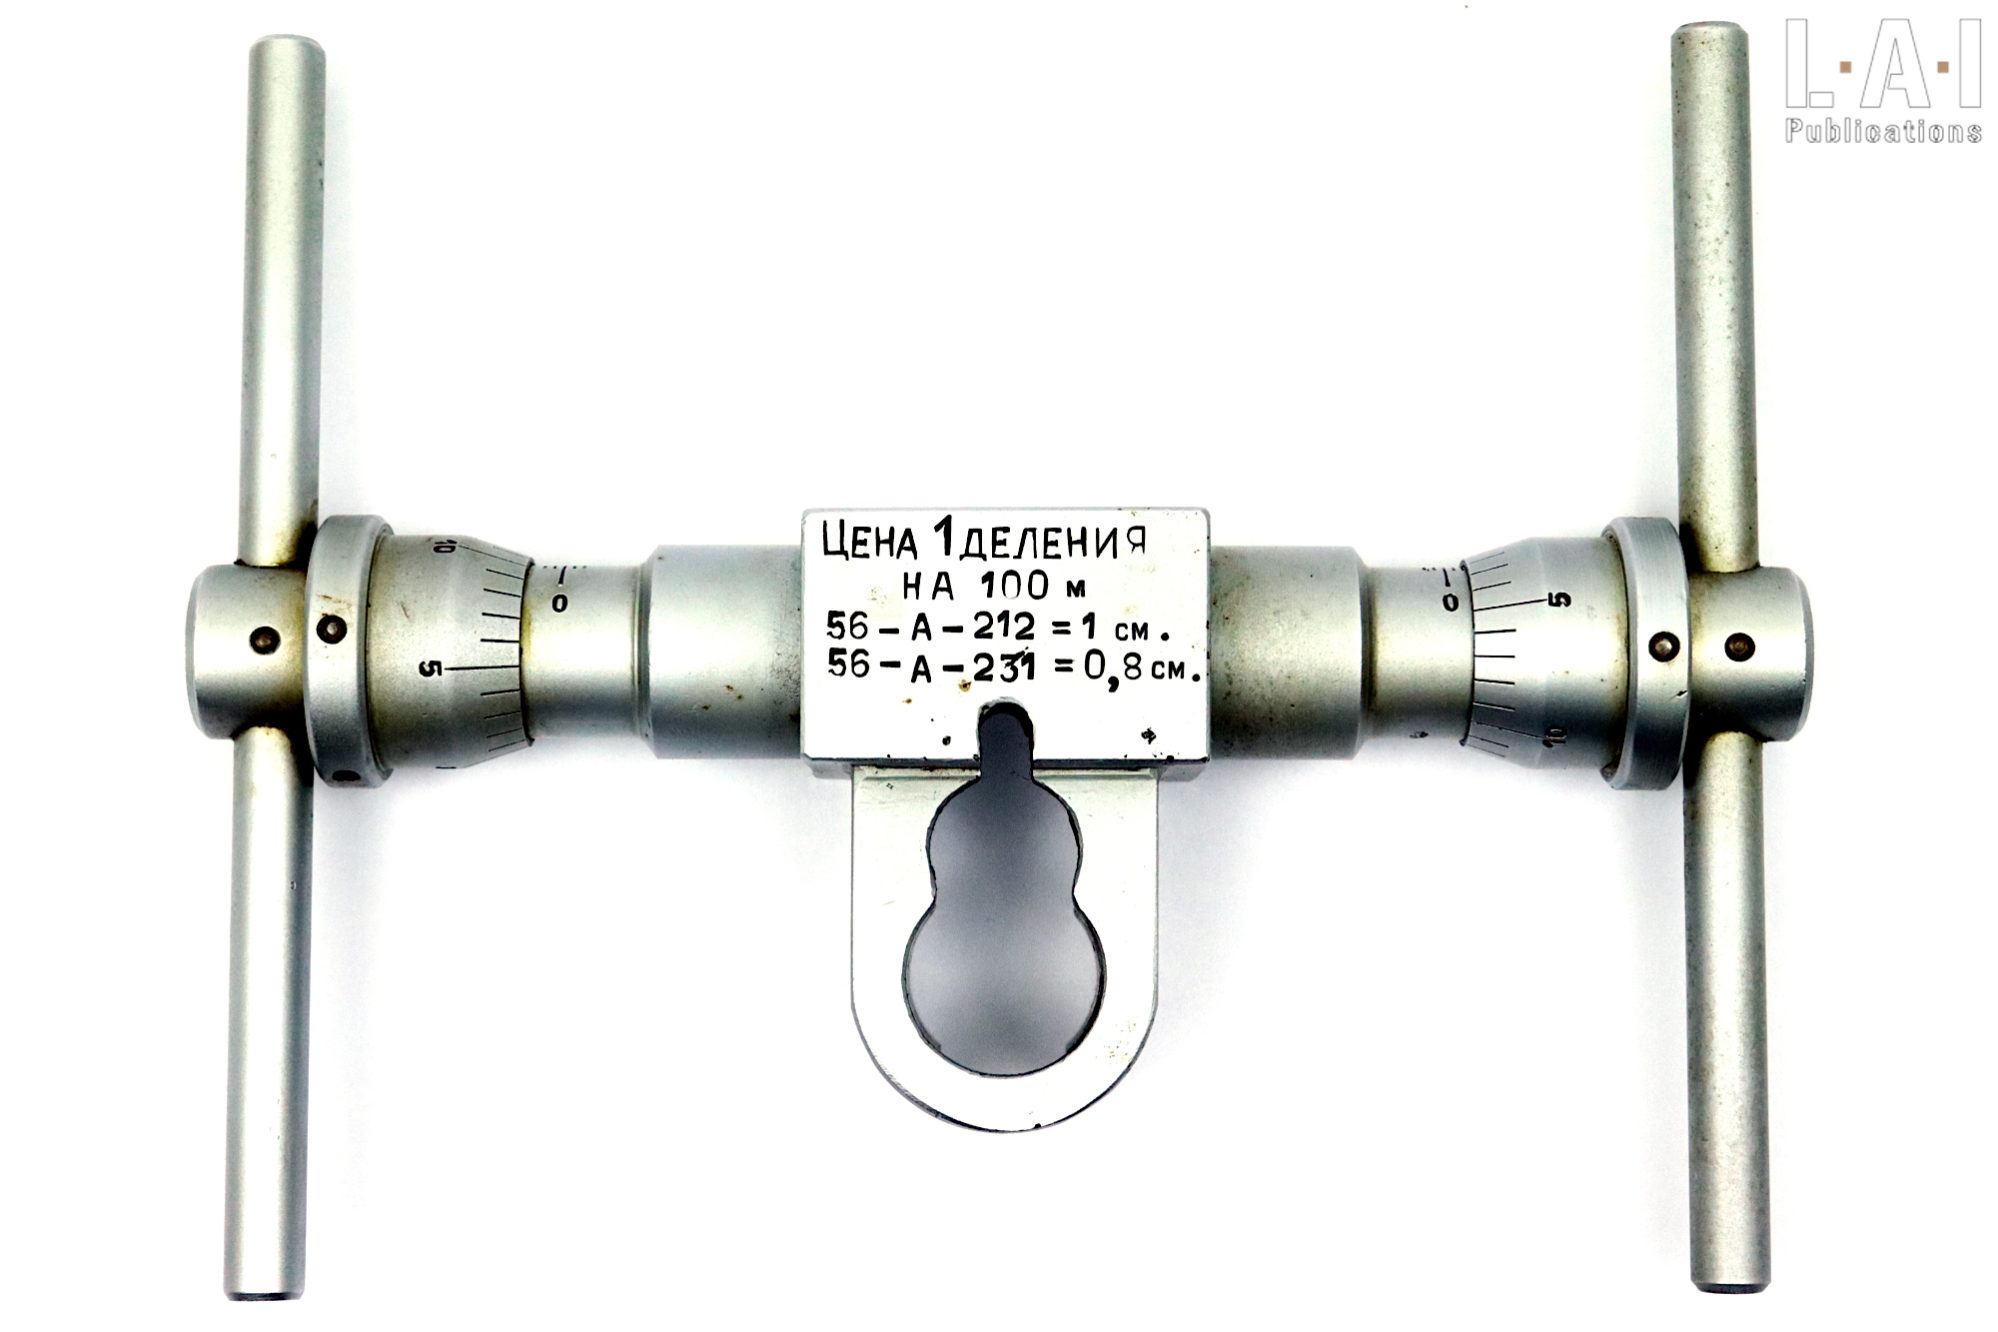
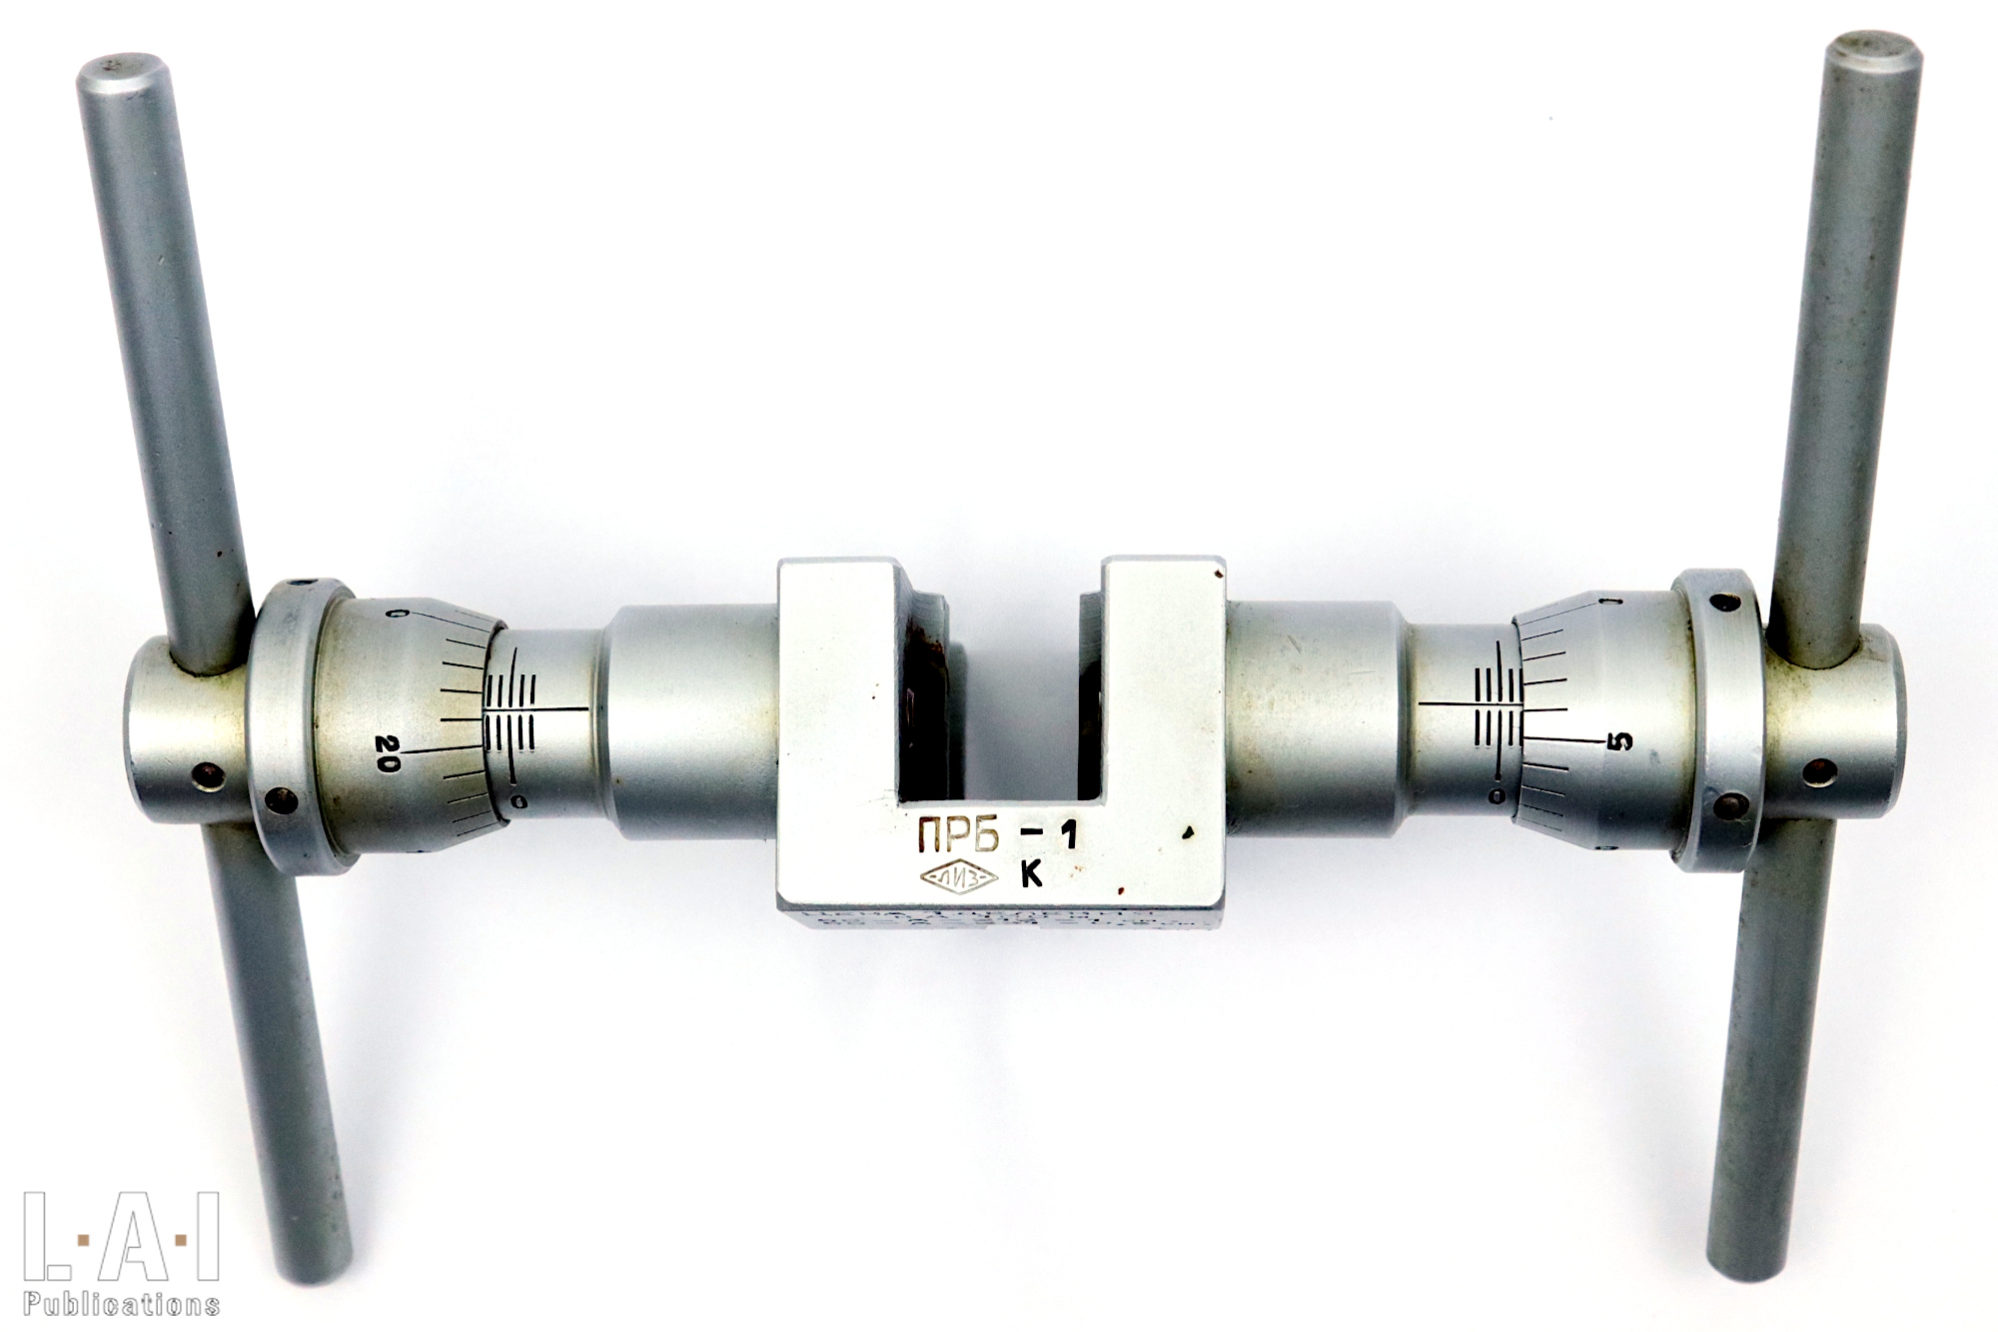
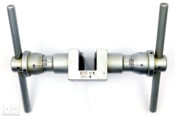
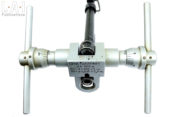
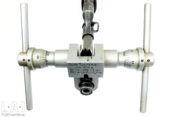
The ПРБ-1 (PRB-1) front sight adjustment tool for AK-47 and SKS-45
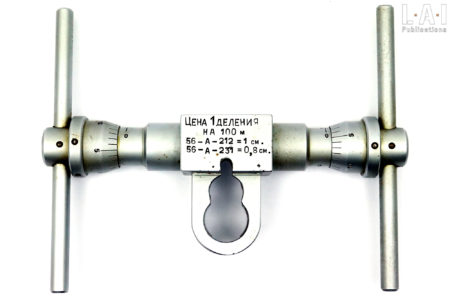
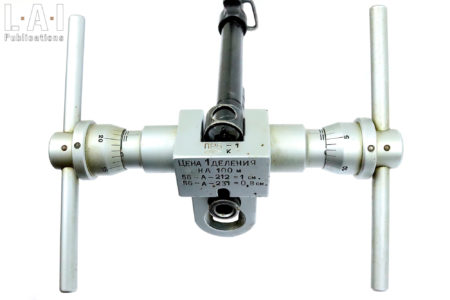
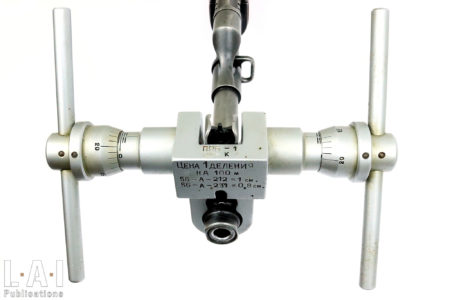
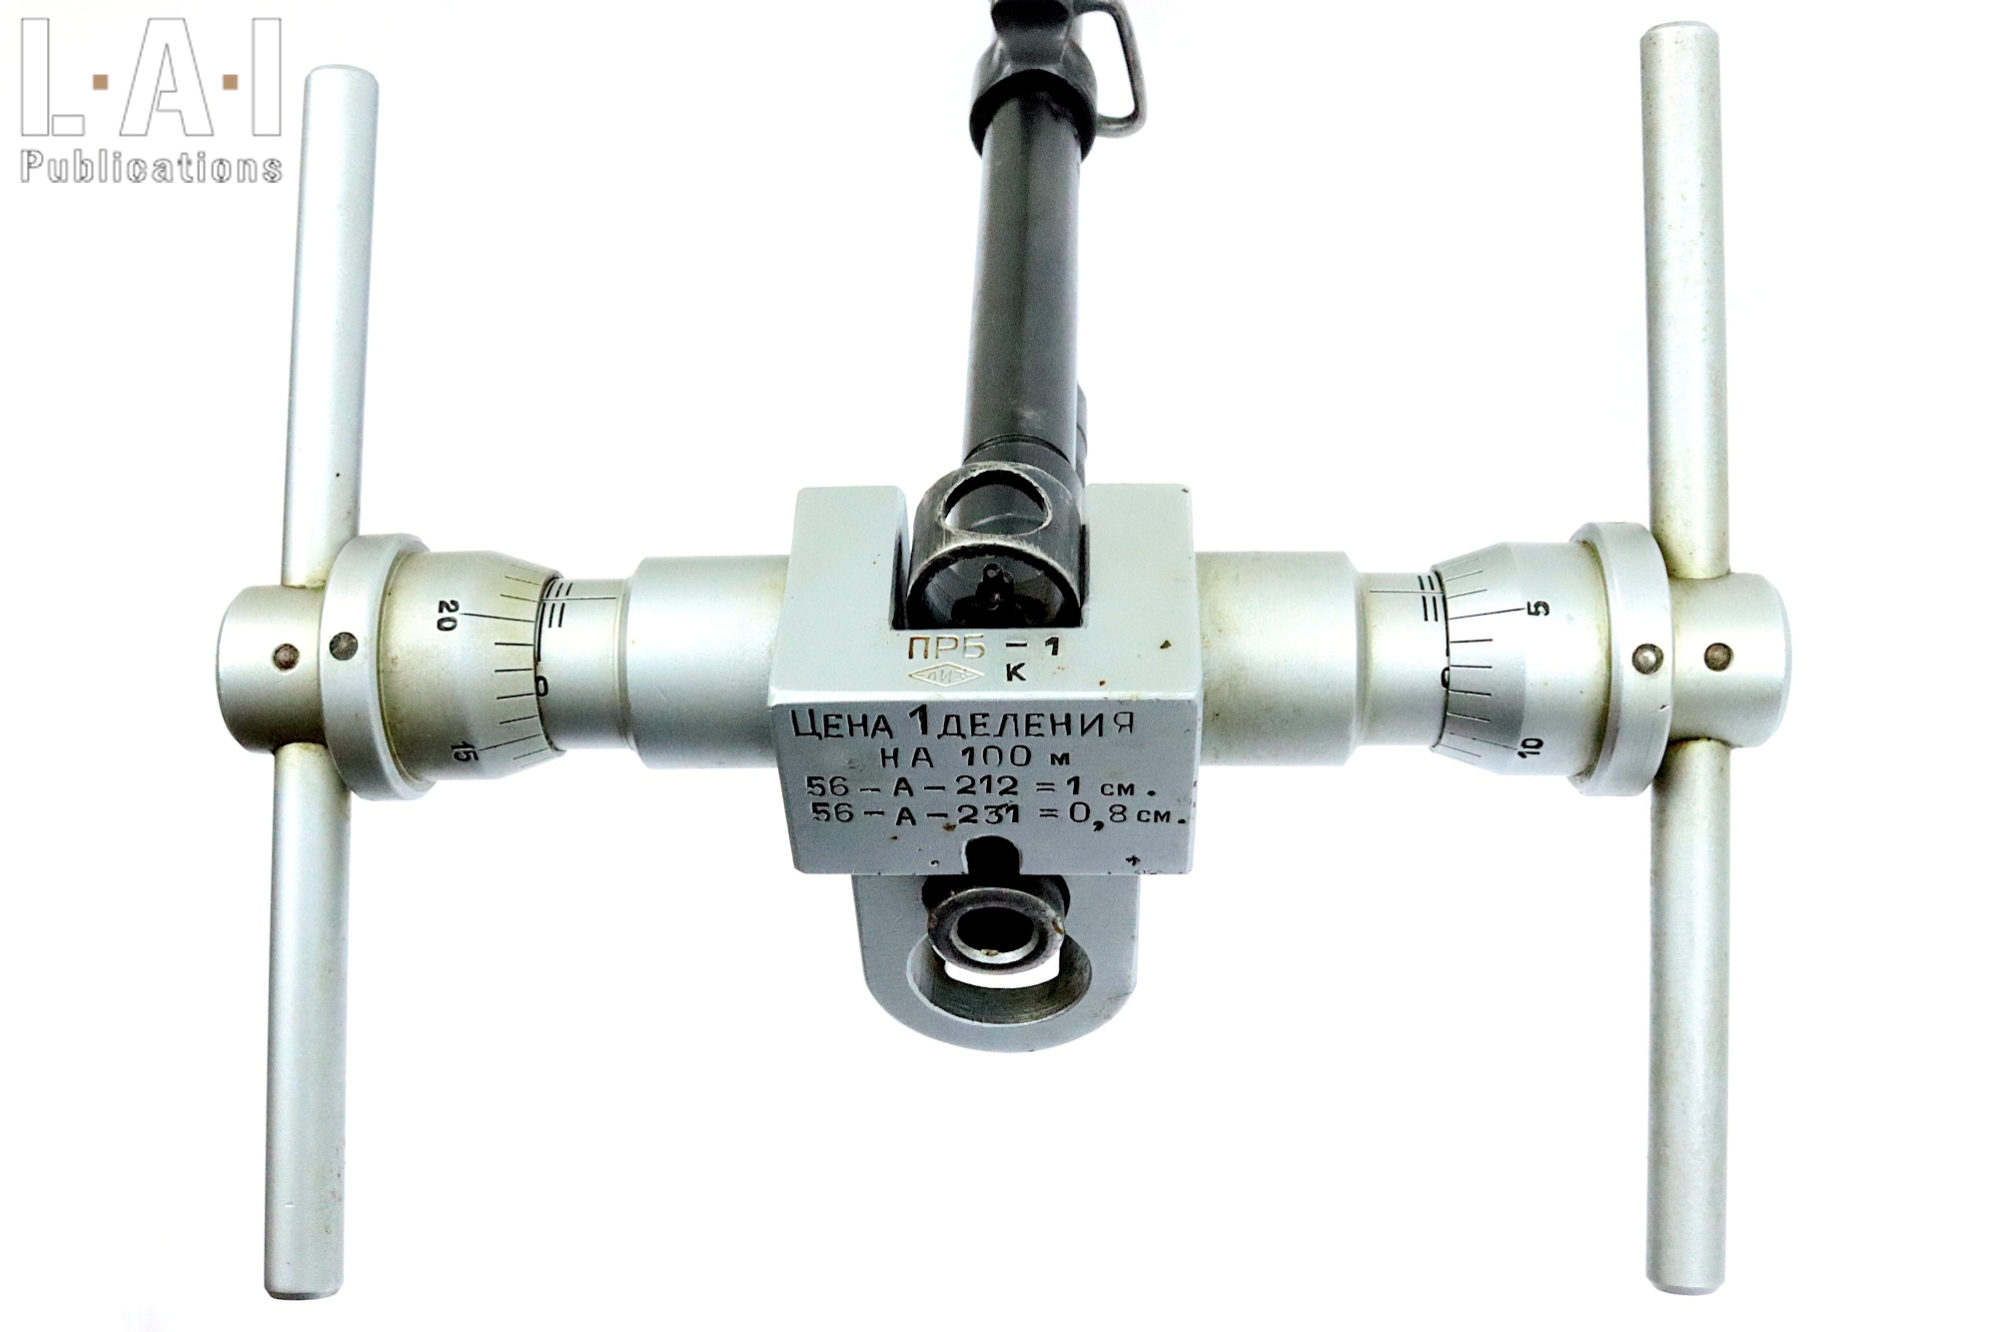
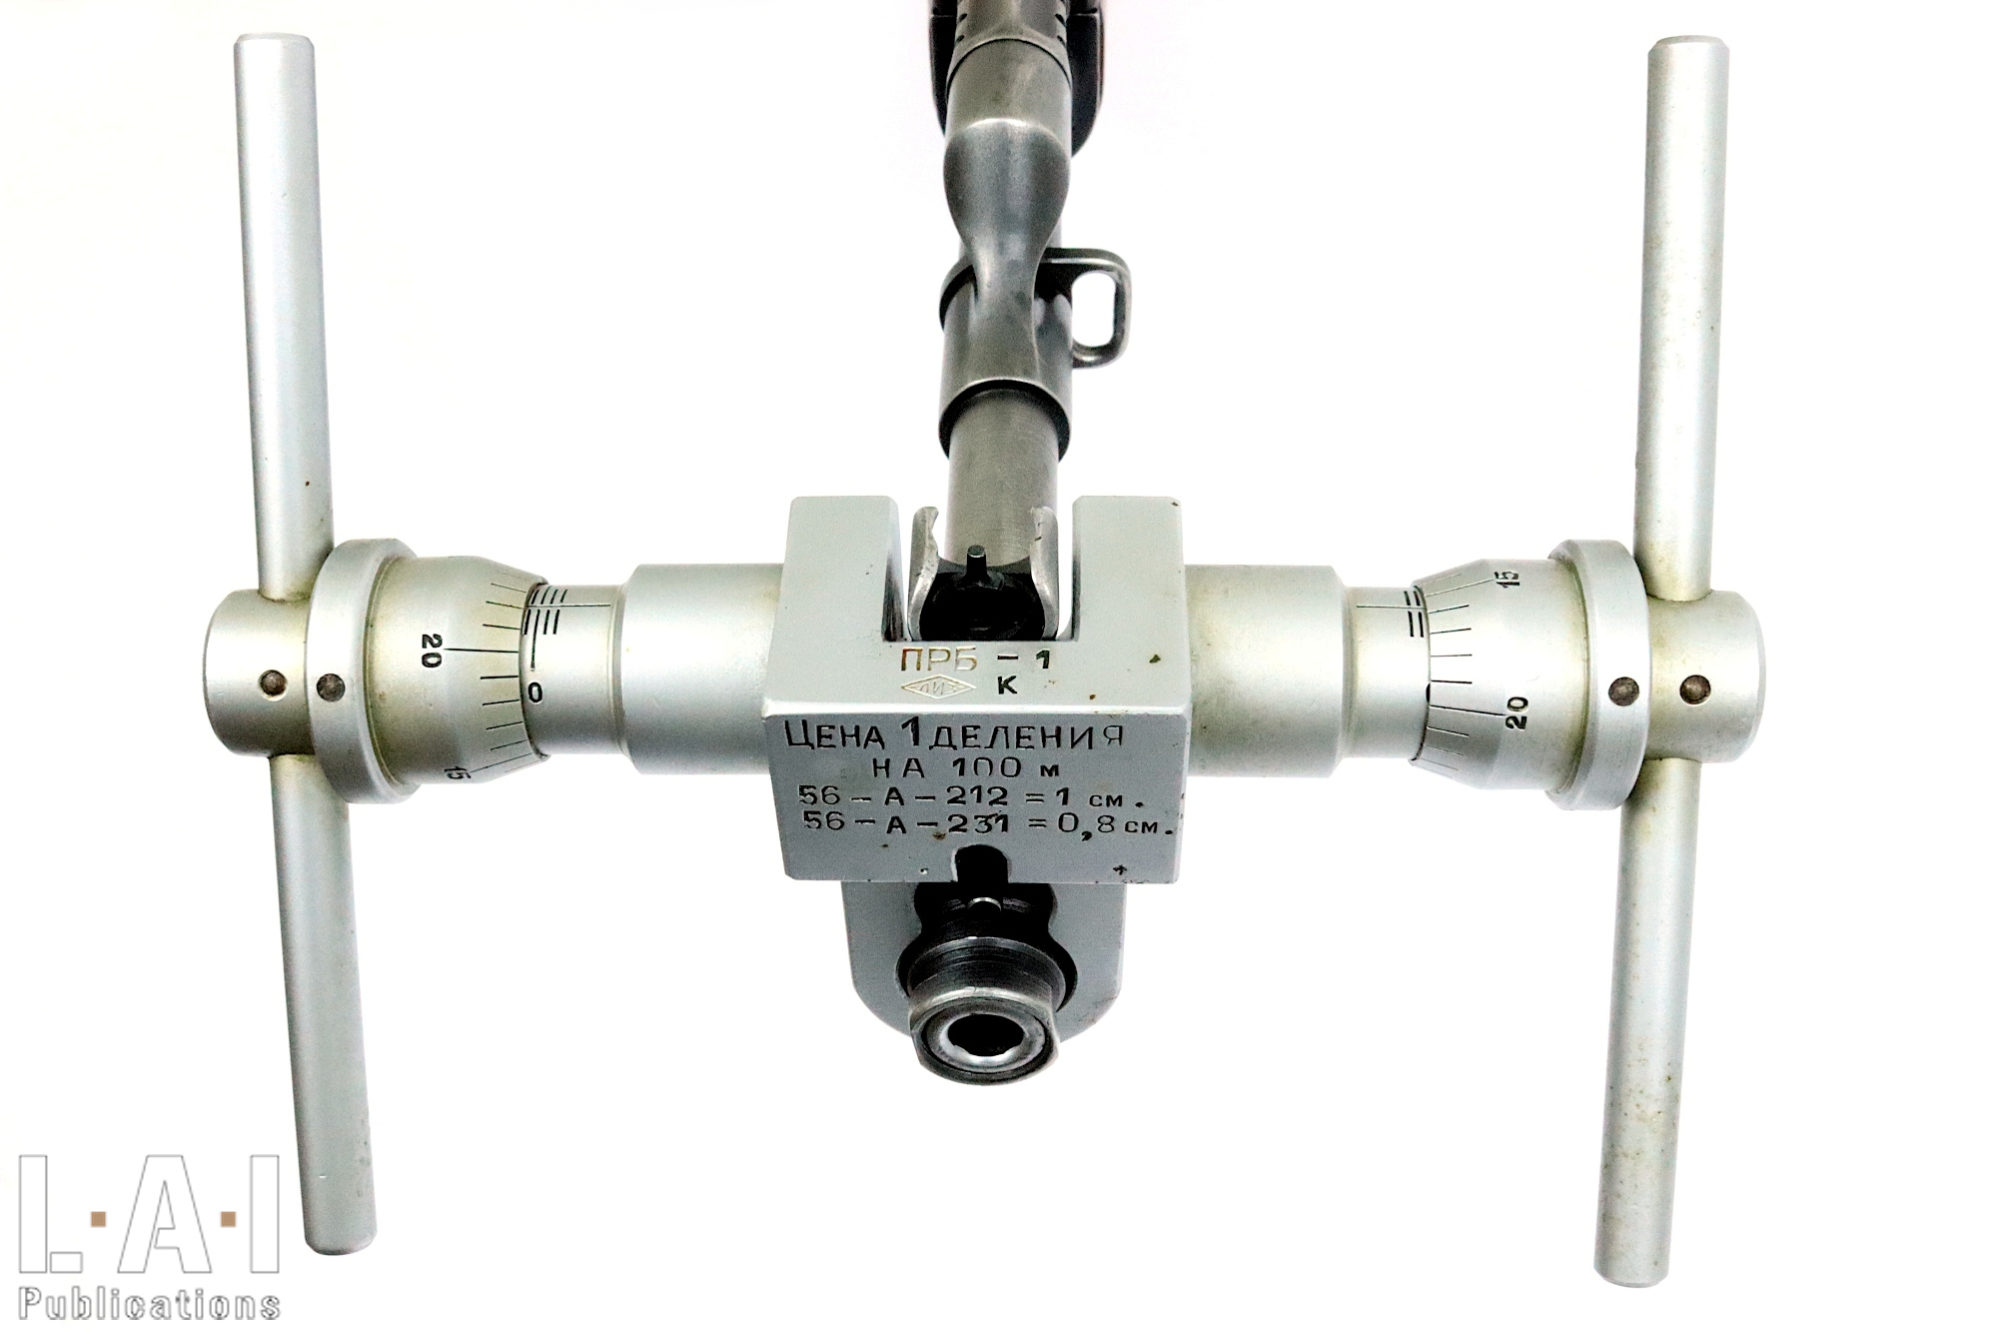
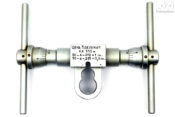
This tool comes in the form of a double-controlled press, with a vernier on each handle (Pics.21 and 22). The graduation on the rod of the tool, indicates the displacement of the front sight support (and therefore, of the front sight itself) in millimeter, and on the vernier, in 1/25 mm with a graduation all the 5/25 of mm. The tool shows us the correspondence of the movement of the front sight for 1 graduation from 1/25 mm to 100 m for each weapon (the difference being due to the difference in the sights length):
- 1 cm to 100 m for the И-212 (AK), or 25 cm at 100 m for 1 mm of displacement.
- 0.8 cm to 100 m for the И-231 (SKS), or 20 cm to 100 m for 1 mm displacement.
It is noted here that if the front sight adjustment value for the SKS corresponds well to that of the Soviet service manual, that of the AK varies from 1 cm to 100 m compared to that of its manual. It is advertised at 26 cm at 100 m for 1 mm of displacement in the service manual, against 25 cm at 100 m on the tool. Is this problematic? Obviously not: the specifications for the use of this type of equipment, especially here in terms of accuracy, are fully compatible with this type of approximation. It is an infantry (assault) rifle, not a match weapon: once again, the Soviets showed pragmatism.
Using the tool ПРБ-1
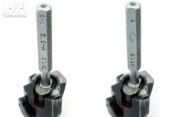
After a first shot of 4 cartridges at 100 m, the average point of the group is established and its deviation from the target point is measured, in height + direction. The tool is then placed on the muzzle of the weapon in order to frame the front sight turret (we obviously take care to arrange the tool with its unscrewed handles so as not to hinder its installation – Pics.23 and 24). The front sight support is then moved by the value corresponding to the difference found between the average point of the grouping and the target point by means of the tool controls. The height adjustment of the front sight is done with the help of the combined tool contained in the stock of the AK or SKS: a turn of the front sight post moves it by 0.75 mm (15 cm to 100 for the SKS-45 and 18.75 or 19.5 mm to 100 m for the AK depending on the value taken into account, 25 or 26 cm for 1 mm of front sight displacement – Pic.25). The values announced for the direction adjustment are therefore identical for the height adjustment. At the end of this adjustment, we repeat the firing of 4 cartridges to observe the modification made on the average point.
In order not to “run after his shot”, it may be wise to make several groupings (3 x 4 cartridges seems to be a reasonable choice) with a re-installation of the shooter between each series. The purpose of this provision is to verify that the skill of the shooter does not excessively influence the adjustment of the weapon… an irregular shooter will never be able to properly adjust his weapon… to be honest… And for those who want more information on this subject… Chapter 9 of the “Small Guide for Firearms”… on this same site!
Once again, it is necessary to remain pragmatic here, whether for the AK, the SKS or the RPD, these are infantry fighting weapons… not match weapons. In this regard, let us remind once again that the precision admissible in Soviet service manual is a circle of 15 cm to 100 m…
Finally, after testing the device, it is found that the setting on “0” of the front sight support corresponds to a centering of it on the turret. Rather precise for a “primitive” weapon… ok, I’m joking.
In conclusion
This control set, like any tool specific to armament, is a superb collector’s item for the technical enthusiast. It can also, if used purposefully, provide valuable help in professional use. However, it is necessary to remain pragmatic: this tooling, used indiscriminately, will not only be unable to solve the slightest problem, but may also lead to the disposal of weapons in a state of service. Finally, it is also necessary to keep in mind that the control of a weapon is carried out above all for a reasoned visual examination … those who are interested in the subject can refer to Chapter 12 of the “Small Guide for Firearms” (in free access!) online on this site.
Arnaud Lamothe
Acknowledgement: Esistoire for the supply of this material.
This is free access work: the only way to support us is to share this content and subscribe. In addition to a full access to our production, subscription is a wonderful way to support our approach, from enthusiasts to enthusiasts!


